Wiring and Mounting Photoelectric Sensors in 2025
You can install a photoelectric sensor safely and effectively in 2025 by following updated installation standards and using the latest technology. Photoelectric sensors require careful wiring and mounting for reliable operation. Always use step-by-step instructions to avoid mistakes. This guide helps you achieve proper installation and optimal performance. Both professionals and DIY users can feel confident when working with photoelectric sensors.
Photoelectric Sensors Types
Photoelectric sensors come in three main types. Each type works best in different situations. You need to know how they work before you start wiring or mounting them.
Tip: Choosing the right sensor type helps you avoid wiring mistakes and ensures better performance.
Through-Beam
Through-beam sensors use two separate devices: an emitter and a receiver. You must mount them facing each other. The emitter sends a light beam to the receiver. When something blocks the beam, the sensor detects it. This type gives you the longest detection distance and the highest reliability. You often see through-beam sensors in places with dust or dirt because they work well even with airborne contaminants. You need to align both parts carefully during installation. This type requires more wiring and setup time.
Retroreflective
Retroreflective sensors have the emitter and receiver in the same housing. You only need to mount a reflector on the opposite side. The sensor sends out a beam, which bounces off the reflector and returns. If something interrupts the beam, the sensor detects it. Retroreflective sensors are easier to install than through-beam types. You do not need to wire a separate receiver. You still need to align the sensor and reflector for best results.
Diffuse
Diffuse sensors have both the emitter and receiver in one unit. You do not need a reflector or a separate receiver. The sensor detects objects when they reflect light back to the receiver. Diffuse sensors work best for short distances. You can install them quickly because you only need to mount one device. These sensors are good for detecting objects that are close to the sensor.
| Sensor Type | Detection Distance | Object Size Detection | Reliability and Notes |
|---|---|---|---|
| Through-beam | 25+ meters (up to 60 m) | As small as 0.01 mm | Most reliable; works despite airborne contaminants; needs careful alignment; higher cost and effort |
| Retroreflective | Up to 10 meters | Not specified | Emitter and receiver in one unit; uses reflector; less distance than through-beam |
| Diffuse | Shorter than retroreflective | Not specified | Simple setup; no reflector needed; best for short-range detection |
Modern photoelectric sensors offer high detection accuracy. In 2025, tests show that some systems reach over 98% accuracy, even at higher speeds. You can trust these sensors for precise and reliable operation in many applications.
Installation Checklist
Before you begin the installation of any photoelectric sensor, you need to follow a pre-installation checklist. This helps you avoid mistakes and keeps your work safe and efficient. You can use this checklist for both new setups and upgrades.
Power Off and Safety
Always start by making sure the power is off. Use lockout/tagout (LOTO) procedures to isolate all power sources. This step protects you from electric shock. Wear personal protective equipment (PPE) like safety glasses, gloves, and sturdy shoes. In areas with explosion risks, choose sensors with ATEX or IECEx certification and use explosion-proof housings. Review all technical documents, such as wiring diagrams and datasheets, before you touch any wires. Follow the manufacturer's manual and safety standards for every installation.
Tip: Never skip safety steps. Even a small mistake can cause injury or damage.
Tools and Materials
Gather all tools and materials before you start the setup. Make sure your tools are in good condition. Remove any damaged equipment right away. Use a digital checklist to track your tools and materials. This helps you stay organized and meet safety codes. Many companies now use RFID tags to track PPE and building materials for compliance. Always check that your materials meet local and national safety codes.
| Checklist Category | Key Points for Sensor Installation |
|---|---|
| Building Materials Compliance | Use approved materials; track with RFID for quality and compliance. |
| Safety Equipment Compliance & Monitoring | Check PPE condition and expiration; maintain safety equipment. |
| Worker Safety & Environmental Compliance | Inspect tools; confirm safe assembly and inspection records. |
Environment and Placement
Check the installation area before you mount the sensor. Make sure the surface is stable and clean. Avoid places with strong ambient light or vibration. Confirm the correct voltage for your sensor. Keep the minimum distance between sensors to prevent interference. Inspect the area for hazards and remove any obstacles. Document the environmental conditions, such as temperature and humidity, to ensure proper operation.
A good pre-installation checklist includes these steps:
1. Verify the installation location and floor space. 2. Gather all manuals, certifications, and documentation. 3. Inspect all components for damage. 4. Confirm the correct power supply. 5. Check environmental conditions. 6. Make sure all connections are ready.
By following this checklist, you set up your photoelectric sensor for safe and reliable operation.
Install a Photoelectric Sensor
Wiring Steps
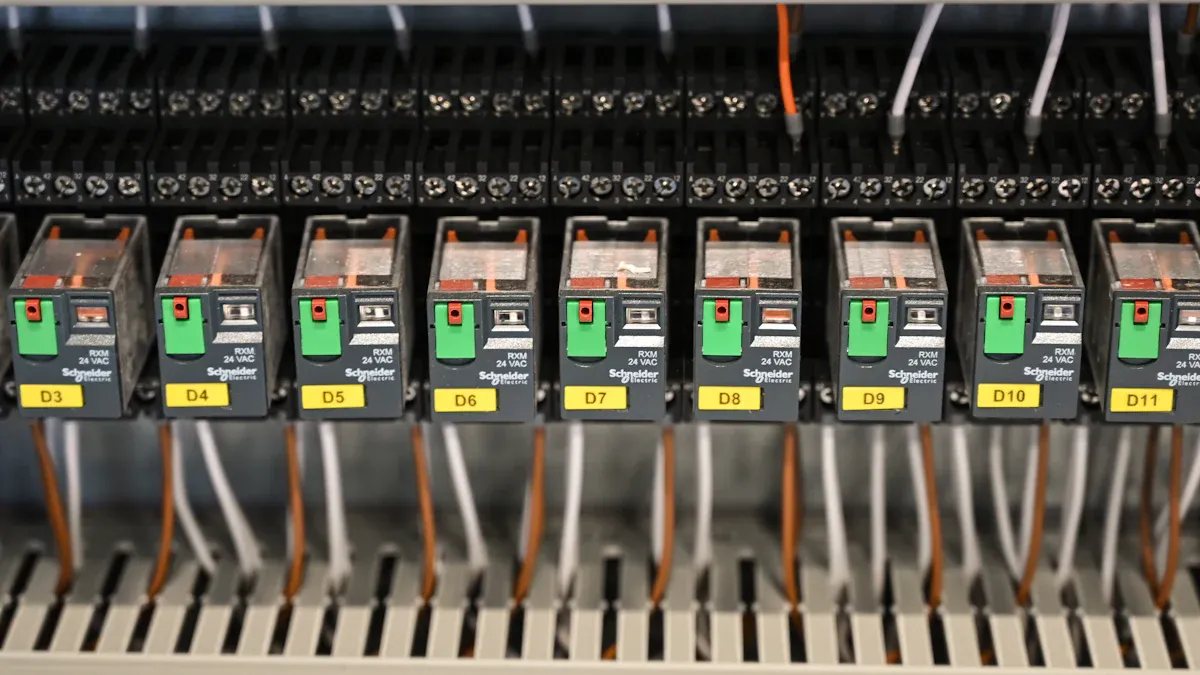
You need to follow clear instructions when you wire a photoelectric sensor. Start by reading the manufacturer's wiring guide. This guide shows you the correct way to connect each wire. Most photoelectric sensors use two-wire, three-wire, or four-wire configurations. You will see wires for power, ground, and output signals.
Turn off all power before you begin. This step keeps you safe.
Check the voltage on your control system. Match it to the sensor’s voltage rating. Most sensors use DC 10-30V or AC 110-220V.
Identify the wires. The brown wire usually connects to power. The blue wire connects to ground. The black or white wire often carries the output signal.
Connect the wires to the correct terminals. Use industrial connectors for a stable and safe connection.
Secure the wires so they do not move or pull out. Avoid sharp bends or pinching.
Double-check your work with the wiring diagram. Make sure every wire matches the instructions.
Note: Always follow the manufacturer’s wiring diagrams. This step prevents equipment damage and ensures your sensor works correctly.
You will find that correct wiring reduces electrical failures. It also helps your sensor last longer and work better in your setup.
Mounting Steps
Proper mounting is just as important as wiring. You need to place the sensor in the right spot and secure it well.
Choose the correct sensor type for your application.
Inspect the mounting surface. Make sure it is stable and free from vibration.
Use mounting brackets that allow you to adjust the sensor’s position. This feature helps you align the sensor with its target.
Position the sensor at the right height and angle. For through-beam sensors, align the emitter and receiver directly. For retroreflective sensors, line up the sensor and reflector. For diffuse sensors, point the sensor at the detection area.
Tighten all screws but do not use too much force. Too much pressure can damage the sensor.
Check for obstructions. Make sure nothing blocks the sensor’s view.
Test the sensor after mounting. Move an object through the detection area to see if the sensor responds.
Tip: Use the step-by-step guide from the manufacturer for best results. Good alignment and secure mounting prevent false triggers and missed detections.
Regular maintenance, such as cleaning the sensor and checking alignment, keeps your installation reliable.
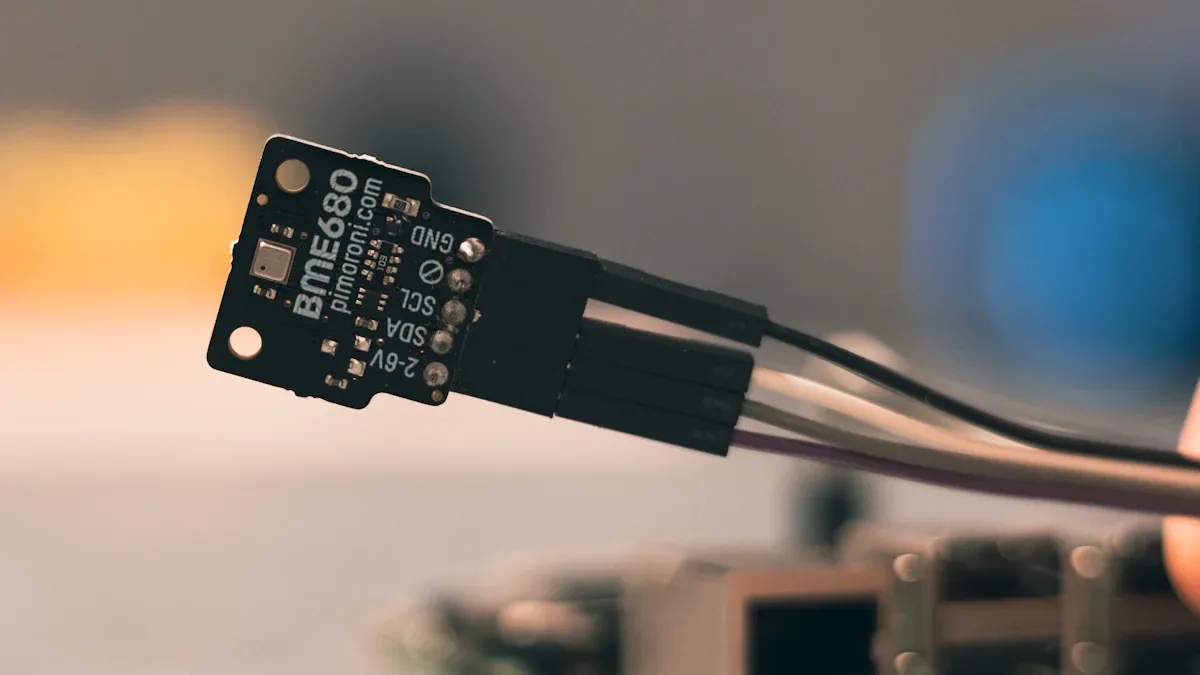
Color Matching and Pinouts
Matching wire colors and pinouts is key to a safe and effective installation. Each photoelectric sensor may have different color codes, so always check the instructions.
| Wire Color | Typical Function | Notes |
|---|---|---|
| Brown | Power (+V) | Connect to positive voltage |
| Blue | Ground (0V) | Connect to ground |
| Black | Output (NPN/PNP) | Signal to control system |
| White | Optional Output/Teach | Used for extra functions |
NPN and PNP outputs: Check your control system to see which type you need. NPN sinks current, while PNP sources current.
Relay outputs: Some sensors use relay contacts for switching.
Pinouts: Look at the sensor’s datasheet for the pin layout. Do not guess the connections.
Alert: Never mix up the wires. Incorrect wiring can cause the sensor to fail or damage your equipment.
You should always use the installation instructions and wiring diagrams from the manufacturer. These documents help you avoid mistakes and keep your photoelectric sensor working safely.
Aligning and Testing Photo Eye Sensor
Alignment
You need to focus on alignment when you install a photo eye sensor. Start by aligning and positioning the sensor so the emitter and receiver face each other directly. For through-beam sensors, place the emitter and receiver in a straight line. Retroreflective sensors need the sensor and reflector to face each other. Diffuse sensors should point at the target area.
Make sure the sensor sits perpendicular to the detection path.
Use the adjustment screws or brackets to fine-tune the position.
Check for any objects that might block the beam.
Proper alignment helps you avoid false alarms and missed detections. Reports show that poor alignment can cause detection failures and reduce reliability, especially in busy industrial spaces.
Sensitivity and Calibration
After you finish alignment, you need to adjust the sensitivity and perform calibration. Sensitivity controls how easily the photo eye sensor detects objects. If you set it too high, the sensor may react to dust or small particles. If you set it too low, it might miss real targets.
A recent study in grain yield monitoring used calibration to match sensor readings with actual grain mass. The team tested different speeds and adjusted the sensor’s sensitivity. They also used a compensation model to fix errors from tilt angles. This process reduced measurement errors to less than 0.25%. You can see that careful calibration and sensitivity adjustment make your sensor more accurate and stable.
Start with the manufacturer’s recommended sensitivity setting.
Test the sensor with real objects.
Adjust the sensitivity knob or use digital controls until you get reliable detection.
Repeat calibration if you change the sensor’s position or environment.
Testing Operation
You should always perform testing after installation. Testing checks if the photo eye sensor works as expected.
Move an object through the detection area and watch the sensor’s response.
Try different object sizes and materials.
Check for false triggers from ambient light or vibration.
Post-installation testing and calibration under real working conditions help you find problems early. This step improves efficiency and safety.
If you notice any issues, repeat the alignment and calibration steps. Good testing ensures your photo eye sensor works reliably every day.
Installation Issues and Troubleshooting
Common Mistakes
You might face several common mistakes during photoelectric sensor installation. Wiring errors often happen when you connect wires to the wrong terminals or mix up NPN and PNP outputs. Mounting mistakes can include loose hardware, poor alignment, or placing the sensor in a spot with too much vibration. Dr. Doug Cobos shared a real case where loose mounting hardware at a Texas A&M testbed caused sensor misalignment and bad data. The team fixed the problem by tightening fittings and adding guy wires for stability. Incorrect sensor orientation, such as not pointing the sensor at the target, can also lead to detection failures.
Misalignment errors are frequent and can have a big impact. The table below shows how accuracy rates change with different tension levels during sensor operation:
| Tension (kgf) | Diagnosis Accuracy (%) |
|---|---|
| 2 | 58.2 |
| 4 | 48.1 |
| 6 | 67.2 |
You can see that misalignment can lower accuracy and make your sensor less reliable.
Tip: Always double-check your wiring and mounting before you finish the installation.
Troubleshooting Steps
If your sensor does not work as expected, you can follow these troubleshooting steps:
Check the power supply. Make sure the voltage matches the sensor’s rating.
Inspect wiring connections. Look for loose or crossed wires. Use the manufacturer’s wiring diagram.
Test the sensor output. Confirm that the output type (NPN or PNP) matches your controller input.
Examine sensor alignment. Adjust the sensor and reflector or receiver until you get a clear signal.
Look for environmental issues. Remove dust, dirt, or objects blocking the sensor’s view.
Secure all mounting hardware. Tighten screws and add supports if needed.
The solisplc tutorial explains that retroreflective sensors need precise alignment with the reflector. Even a small misplacement can cause the sensor to fail. Always follow the manufacturer’s instructions and perform testing after any adjustment. Careful troubleshooting helps you find and fix problems quickly, so your sensor works well.
You can install photoelectric sensors safely and effectively by following each step in this guide. Always use updated standards and best practices. Systematic testing and quality control, as seen in medical device and manufacturing industries, help you achieve reliable sensor performance. Double-check your wiring, alignment, and test the sensor before use. Regular maintenance keeps your system running smoothly. Apply these tips with confidence to get the best results from your photoelectric sensors in 2025.
FAQ
How do you know which photoelectric sensor type to choose?
You should look at your detection distance and object size. Through-beam sensors work best for long distances. Retroreflective sensors need a reflector. Diffuse sensors are good for short-range tasks. Always check your application needs before you decide.
What should you do if your sensor gives false triggers?
First, check for strong ambient light or dust near the sensor. Clean the lens and adjust the sensitivity. Make sure nothing blocks the beam. If problems continue, review the wiring and alignment.
Can you wire a photoelectric sensor without a wiring diagram?
You should never wire a sensor without a diagram. Always use the manufacturer’s guide. Incorrect wiring can damage the sensor or your equipment. If you lose the manual, download it from the manufacturer’s website.
How often should you clean and check your photoelectric sensor?
You should inspect and clean the sensor every month. Dust and dirt can block the beam. Regular checks help you find loose wires or misalignment early. This keeps your sensor working well.
What does NPN and PNP mean for sensor outputs?
NPN and PNP describe how the sensor sends signals. NPN sensors connect the output to ground. PNP sensors connect the output to power. You must match the sensor type to your control system.
Tip: Check your controller’s input type before you buy a sensor.
 UTMEL
UTMEL
We are the professional distributor of electronic components, providing a large variety of products to save you a lot of time, effort, and cost with our efficient self-customized service. careful order preparation fast delivery service
 The Key Role of Electronic Components in IoT DevicesUTMEL01 September 20234628
The article discusses the pivotal role of electronic components in Internet of Things (IoT) devices. IoT devices work by capturing real-world data using sensors, processing it through a microcontroller, and then sending it to the cloud for further analysis.
Read More How to Identify the Perfect Proximity Sensor for Your ApplicationUTMEL19 July 2025497
Find the best proximity sensors for your project by evaluating material, sensing range, environment, and system needs to ensure optimal performance and reliability.
Read More Trusted Vibration Sensors for Homeowners and Industry ProfessionalsUTMEL17 July 2025402
Compare top vibration sensors for home and industrial use. Find trusted options for security, predictive maintenance, and equipment protection.
Read More Wiring and Mounting Photoelectric Sensors in 2025UTMEL15 July 2025489
Wire and mount photoelectric sensors in 2025 with step-by-step safety, wiring, and alignment tips for reliable installation and optimal sensor performance.
Read More Essential Tips for Picking the Best Gas SensorUTMEL15 July 20251242
Find out how to select gas sensors by matching target gases, environment, and compliance needs for reliable and accurate gas detection in any setting.
Read More
Subscribe to Utmel !
![37646]() 37646
37646Protektive Pak
![37640]() 37640
37640Protektive Pak
![770028]() 770028
770028SCS
![35890]() 35890
35890MENDA/EasyBraid
![37554]() 37554
37554Protektive Pak
![39203]() 39203
39203Protektive Pak
![09863]() 09863
09863Desco
![ZJ-BAS-MC07RB]() ZJ-BAS-MC07RB
ZJ-BAS-MC07RBOmron Automation and Safety
![ZJ-BAS-MC05A]() ZJ-BAS-MC05A
ZJ-BAS-MC05AOmron Automation and Safety
![ZJ-BAS-MC05B]() ZJ-BAS-MC05B
ZJ-BAS-MC05BOmron Automation and Safety