Product
 Brand
Brand Articles
 Tools
Tools
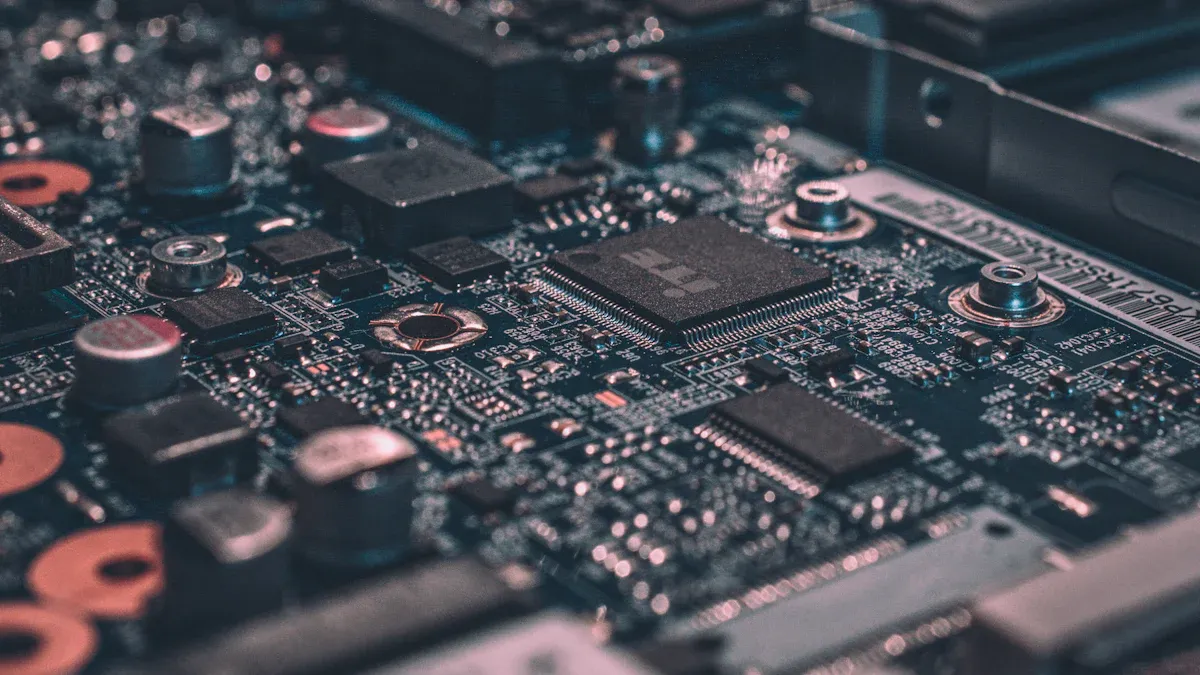
Shift Registers Made Simple for New Learners
You can think of a shift register as a line of buckets passing marbles from one to the next. When you put a marble in the first bucket, each tap on the table moves it down the line. In digital electronics, shift registers help you store and move digital bits. You often find a register holding four or eight bits, like a 4-bit register showing a pattern such as 1000, 0100, 0010, 0001. Shift registers let you control digital displays, manage timing, and even run LED patterns. These registers are everywhere in digital projects, and you can master them step by step.
Shift registers help you convert serial data to parallel data and vice versa.
Registers like the CD4035 can shift, store, and clear data quickly.
Digital systems rely on shift registers for smooth data flow.
Don’t worry if this sounds new—understanding shift registers is totally within your reach!
What Is a Shift Register?
Basic Definition
You can think of a shift register as a special digital circuit that helps you store bits and move them around. Imagine a row of lockers, each holding a single bit of data. When you want to store a new bit, you place it in the first locker. With each signal, the bits shift down the line, just like passing a note from one person to the next. This is how a shift register works. It stores and moves bits in a controlled way, making it easy to handle data in digital systems.
A shift register is made up of flip-flops connected in a series. Each flip-flop holds one bit. When you send a clock signal, the register shifts the bits from one flip-flop to the next. This process lets you store bits and move bits through the register, one step at a time. You often see shift registers in devices that need to convert serial data to parallel data or the other way around.
Tip: Shift registers are the building blocks for many digital projects, from LED displays to memory storage.
How Shift Registers Work
Shift registers work by moving data through a chain of flip-flops. Each time you send a clock pulse, the register shifts the bits to the next flip-flop. This action lets you control how data enters and exits the register. You can use shift registers to change how data is organized, like turning a stream of serial data into a set of parallel outputs.
Let’s look at a table that shows how different types of shift registers operate:
| Shift Register Type | Input Method | Output Method | Operation Description |
|---|---|---|---|
| Serial In – Serial Out (SISO) | Serial input (1 bit) | Serial output (1 bit) | Data bits enter one at a time and shift through a chain of D flip-flops triggered by clock rising edges, moving bit by bit. |
| Serial In – Parallel Out (SIPO) | Serial input (1 bit) | Parallel outputs | Data bits enter serially but can be accessed simultaneously at each flip-flop output, allowing parallel reading of bits. |
| Parallel In – Serial Out (PISO) | Parallel inputs | Serial output (1 bit) | Multiple bits loaded simultaneously into flip-flops via multiplexers, then shifted out serially on clock triggers. |
| Parallel In – Parallel Out (PIPO) | Parallel inputs | Parallel outputs | All bits loaded and output simultaneously on clock trigger; no shifting occurs unless additional logic is added. |
You will find that shift registers can handle both serial and parallel data. For example, if you have a stream of serial data, a SIPO register can turn it into parallel outputs. If you need to send several bits out one at a time, a PISO register does the job. This makes shift registers very useful in digital electronics.
You might hear about shift left registers and shift right registers. A shift left register moves bits toward the higher order, while a shift right register moves bits toward the lower order. This direction depends on how you connect the flip-flops and where you send the data.
Flip-Flops and Clock Signals
Flip-flops are the heart of every shift register. Each flip-flop can store one bit of data. When you connect several flip-flops in a row, you create a register that can store multiple bits. The clock signal tells the register when to move the bits. Every time the clock ticks, the register shifts the data from one flip-flop to the next.
Here’s how it works step by step:
You load a bit into the first flip-flop.
The clock signal triggers all flip-flops at the same time.
Each flip-flop passes its bit to the next one in line.
The last flip-flop sends its bit out as the output.
This process repeats with each clock pulse. The timing is important. The data must be stable before and after the clock edge, so the register can move the bits correctly. If you use a serial-in serial-out register, you can watch each bit travel through the chain with every clock pulse.
Note: Flip-flops keep the output steady until the next clock pulse. This makes shift registers reliable for storing and moving data in digital circuits.
You can use shift registers in many ways. For example, you can control a row of LEDs with just a few microcontroller pins. You can also use them to store data, count events, or even create simple memory devices. When you connect the output of the last flip-flop back to the first, you make a ring counter. This setup lets a single '1' bit circulate through the register, which is handy for timing and sequencing tasks.
Shift registers give you a powerful way to store bits, move bits, and organize data in your digital projects. Once you understand how flip-flops and clock signals work together, you can use shift registers for all kinds of creative solutions.
Why Shift Registers Matter
Data Storage and Transfer
You might wonder why a shift register is so important in digital electronics. The answer is simple: it helps you store and move data with ease. When you use a shift register, you can keep several bits safe until you need them. Each register holds its own bit, and together, they form a small memory bank. This is called data storage.
Shift registers make data movement smooth. You can load data into the register and then shift it out one bit at a time or all at once. This is handy when you want to send information from one part of a digital system to another. For example, in a microcontroller project, you can use a shift register to save storage space and reduce the number of wires needed.
Tip: Shift registers use clock signals to keep data transfer steady and reliable. This means your data will not get mixed up or lost during movement.
A shift register also helps with timing. By shifting bits with each clock pulse, you can delay data or line up signals just right. This makes shift registers perfect for digital electronics projects that need precise control.
Serial and Parallel Conversion
One of the coolest things about shift registers is how they handle serial and parallel data. Sometimes, you need to send data one bit at a time (serial). Other times, you want to send several bits at once (parallel). A shift register lets you switch between these two methods.
Let’s look at how this works:
A serial in parallel out register (SIPO) takes serial data and gives you parallel outputs. This is great for turning a stream of bits into a set of signals you can use all at once.
A parallel in serial out register (PISO) does the opposite. You load all your bits at once, and the register sends them out one by one.
This ability to convert serial to parallel data and back again helps you save space and speed up your digital projects. In communication systems, shift registers reduce the number of wires needed, making your design simpler and more efficient. Studies show that using shift registers for serial and parallel conversion improves system performance by optimizing data handling and resource use.
| Register Type | Data Input | Data Output | Best Use Case |
|---|---|---|---|
| SISO | Serial | Serial | Simple data movement |
| SIPO | Serial | Parallel | Serial to parallel conversion |
| PISO | Parallel | Serial | Sending multiple bits over one line |
| PIPO | Parallel | Parallel | Fast data transfer |
You can trust shift registers for reliable data conversion. They use synchronized clock signals to keep everything in order. This means your data stays accurate, even when moving between serial and parallel formats. Shift registers play a key role in digital electronics, making data storage, transfer, and conversion easy for you.
Types of Shift Registers
When you start learning about digital electronics, you will see that there are several types of shift registers. Each type has its own way of handling data. You can use these registers to move, store, or convert data in your projects. Let’s look at the main types of shift registers and see how they work.
Serial In Serial Out Shift Register
A serial in serial out shift register is the simplest type. You feed data into the register one bit at a time, and it comes out one bit at a time. Think of it like a line of people passing a ball from one person to the next. Each person holds the ball for a moment, then passes it on when you clap your hands. That clap is like the clock signal.
Here’s how a 4-bit serial in serial out shift register works:
You reset all flip-flops to zero.
You send the first bit to the input.
The first clock pulse stores the bit in the first flip-flop.
You send the next bit and give another clock pulse. The first bit moves to the next flip-flop, and the new bit enters the first one.
After four clock pulses, all four bits fill the register.
You can use a serial in serial out shift register as a digital delay line. It holds data for a set number of clock cycles before sending it out. This type is common in timing circuits and digital filters.
[Din] → [FF1] → [FF2] → [FF3] → [FF4] → [Dout]
You will often see this type in simple data movement tasks, like shifting data between two devices.
Statistical studies show that serial in serial out shift registers work well as key-stream generators in cryptography. They offer reliable performance and can create long, repeating patterns.
Serial In Parallel Out Shift Register
A serial in parallel out shift register lets you feed in data one bit at a time, but you can read all the bits at once. Imagine you are filling four buckets, one after another. When you finish, you can see what’s inside each bucket at the same time.
This type is perfect when you want to convert serial data to parallel data. For example, if you have a microcontroller with only one data pin, you can use a serial in parallel out shift register to control several LEDs at once.
Here’s a simple diagram:
[Din] → [FF1] → [FF2] → [FF3] → [FF4]
           |      |      |      |
         Q1     Q2     Q3     Q4
Din: Serial data input
Q1-Q4: Parallel outputs
You can use this register to drive displays, expand output pins, or collect sensor data. The serial in parallel out shift register is very popular in digital projects because it saves wiring and makes your circuits neat.
Tip: You can chain several serial in parallel out shift registers together to control even more outputs with just a few pins.
Parallel In Serial Out
A parallel in serial out shift register works the other way around. You load all your bits into the register at once, then send them out one by one. This is like putting four balls into four buckets at the same time, then rolling them out one after another.
You often use a parallel in serial out shift register when you want to send lots of data over a single wire. For example, you might want to send the state of four switches to another device using only one data line.
Here’s a simple diagram:
P1  P2  P3  P4
 |   |   |   |
[FF1][FF2][FF3][FF4] → Dout
P1-P4: Parallel data inputs
Dout: Serial output
You can use this type to convert parallel data to serial data. It helps you save space and reduce the number of wires in your project.
You will find parallel in serial out shift registers in keyboards, data loggers, and communication systems.
Parallel In Parallel Out
A parallel in parallel out shift register lets you load all your bits at once and read them all at once. There is no shifting unless you add extra logic. This type is like a row of lockers where you put items in and take them out at the same time.
You use a parallel in parallel out shift register when you need fast data transfer. For example, you might want to move data quickly between two parts of a computer.
Here’s a simple diagram:
P1  P2  P3  P4
 |   |   |   |
[FF1][FF2][FF3][FF4]
 |   |   |   |
Q1  Q2  Q3  Q4
P1-P4: Parallel inputs
Q1-Q4: Parallel outputs
You can use this register for temporary data storage or to synchronize data between circuits.
Parallel in parallel out shift registers are great for memory buffers and fast data buses.
More Types and Real-World Uses
Besides these main types of shift registers, you will also find bidirectional shift registers and universal shift registers. A bidirectional shift register can shift data left or right. This means you can move bits in both directions, which is useful for certain algorithms and data manipulation tasks.
A universal shift register can do everything. It can shift left, shift right, load data in parallel, or output data in parallel. You can use it in complex digital systems where you need flexibility. Universal shift registers are common in microprocessors and advanced digital circuits.
Here’s a quick table to help you compare the types of shift registers:
| Type | Data In | Data Out | Main Use Case |
|---|---|---|---|
| Serial in serial out shift register | Serial | Serial | Delay lines, timing, cryptography |
| Serial in parallel out shift register | Serial | Parallel | LED driving, display control |
| Parallel in serial out shift register | Parallel | Serial | Data transmission, keyboards |
| Parallel in parallel out shift register | Parallel | Parallel | Fast data transfer, memory buffers |
| Bidirectional shift register | Serial/Parallel | Serial/Parallel | Data manipulation, counters |
| Universal shift register | Serial/Parallel | Serial/Parallel | Complex digital systems |
You will see that the types of shift registers each have their own strengths. You can pick the right one for your project based on how you want to move and store your bits.
Note: Studies show that clock-controlled shift registers, like the ones you use in cryptography, offer strong reliability and performance. They can handle large amounts of data and work well in secure systems.
When you work with shift registers, you open up many possibilities. You can control LEDs, manage data, and even build your own memory circuits. Try using a universal shift register in your next project if you want to experiment with all the features.
Applications of Shift Registers
Microcontroller Interfacing
You often need to connect many devices to your microcontroller, but you only have a few pins. Shift registers help you solve this problem. You can use a Serial-In Parallel-Out shift register to control several outputs, like LEDs or relays, with just three microcontroller pins. This means you send data one bit at a time, and the shift register changes it into parallel signals for your devices.
You can expand your microcontroller’s output pins by chaining shift registers together.
Parallel-In Serial-Out shift registers let you read many inputs, like buttons, using only one pin. You load the data from all buttons at once, then shift it out to the microcontroller.
Shift registers also help with timing. They can act as pulse extenders, making sure your signals last as long as you need.
You can find the 74HC595 shift register in many projects. It takes serial data from your microcontroller and gives you eight parallel outputs. You only need three pins to control it, and you can connect more for even bigger projects.
LED Driving
You can use shift registers to light up many LEDs with just a few microcontroller pins. This makes your projects look cool and saves space on your board. When you build an LED matrix, you send data to the shift registers, and they turn on the right LEDs in parallel. You can even chain several shift registers to control large displays.
A popular project shows how you can use shift registers to drive an LED matrix. You connect the LEDs in rows and columns, then use the shift registers to send data for each row. This setup lets you create patterns, animations, or even scrolling text. You only need a few wires from your microcontroller, but you can control dozens of LEDs.
Tip: Shift registers make it easy to refresh your LED display quickly. You can update the data for each row in just a few microseconds.
Digital Delay Lines
Sometimes you need to delay a signal in your circuit. Shift registers can help you do this. A Serial-In Serial-Out shift register passes data through a chain of flip-flops. Each clock pulse moves the data one step forward. The more flip-flops you use, the longer the delay.
You can use this feature to create digital delay lines. For example, if you want to delay a signal by four clock cycles, you use a four-stage shift register. The data enters the first flip-flop, then moves through each stage until it comes out at the end. This method gives you precise control over the timing of your signals.
You can use digital delay lines in audio effects, timing circuits, or any project where you need to hold data for a set time.
LED Project with Shift Register
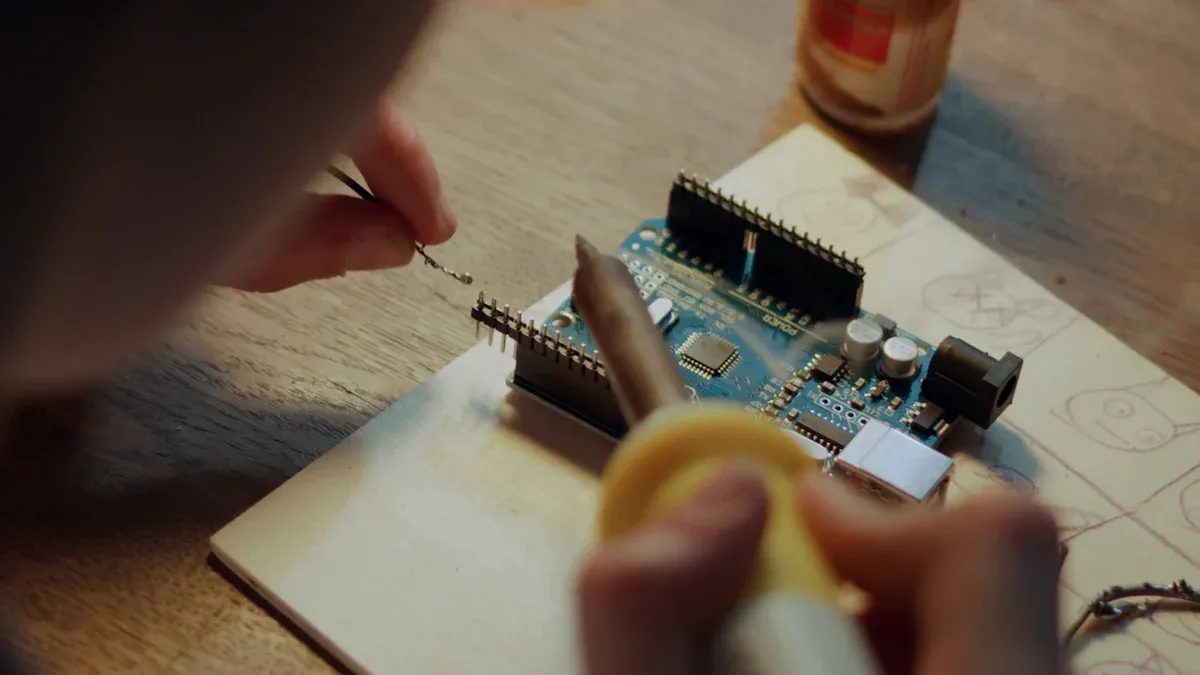
Parts Needed
You can build a fun LED project with just a few parts. Here’s what you need:
1 × 74HC595 shift register
8 × LEDs (any color you like)
8 × 220Ω resistors
1 × Arduino (Uno, Nano, or similar)
Jumper wires
Breadboard
Tip: The 74HC595 shift register lets you control 8 LEDs using only 3 pins from your Arduino. This saves you a lot of wiring!
Step-by-Step Guide
Let’s get started! You will wire the shift register and LEDs, then upload code to your Arduino.
Place the 74HC595 on your breadboard.
Connect the 8 LEDs to the Q0–Q7 pins of the shift register. Put a resistor in series with each LED.
Connect the shift register’s VCC and GND to your Arduino’s 5V and GND.
Attach the shift register’s DS (data), SHCP (clock), and STCP (latch) pins to Arduino pins 11, 12, and 8.
Double-check your wiring.
Here’s a simple wiring diagram:
Arduino Pin 11 (DS)  → 74HC595 Pin 14 (DS)
Arduino Pin 12 (SHCP) → 74HC595 Pin 11 (SHCP)
Arduino Pin 8 (STCP)  → 74HC595 Pin 12 (STCP)
Now, upload this code to your Arduino:
int latchPin = 8;
int clockPin = 12;
int dataPin = 11;

void setup() {
  pinMode(latchPin, OUTPUT);
  pinMode(clockPin, OUTPUT);
  pinMode(dataPin, OUTPUT);
}

void loop() {
  for (int i = 0; i < 8; i++) {
    digitalWrite(latchPin, LOW);
    shiftOut(dataPin, clockPin, MSBFIRST, 1 << i);
    digitalWrite(latchPin, HIGH);
    delay(200);
  }
}
How It Works
You send data to the 74HC595 one bit at a time. Each clock pulse moves the bits through the register, just like rolling balls down a Skee-Ball machine. The shift register lights up each LED in order, creating a moving pattern. This project works like the popular "Shift Register Menorah" from Hackaday.io, where each clock pulse lights the next LED, making it easy to see how shifting works.
You only use three Arduino pins to control all eight LEDs. The code uses a loop to shift a single “on” bit through the register, lighting one LED at a time. This setup shows you how to control many outputs with just a few wires. You can even chain more shift registers to control more LEDs, just like in advanced projects that use shared clock and latch lines for efficiency.
Note: This project helps you learn how shift registers work in real circuits. You can change the code to create your own LED patterns!
Troubleshooting Shift Registers
Common Issues
When you work with shift registers, you might run into a few problems. Don’t worry—most issues have simple fixes! Here are some common things that can go wrong:
No Output or Flickering LEDs:
You might see nothing light up, or your LEDs might blink in strange ways. This often happens if you connect the flip-flops incorrectly or if the clock signal is unstable.Wrong Data Sequence:
Sometimes, the output does not match what you expect. This can happen if you mix up the order of the flip-flops or if you send data too quickly.Data Not Shifting:
If your data stays stuck, check the connections between the flip-flops. A loose wire can break the chain.Multiple LEDs On at Once:
You may see more than one LED light up when only one should. This usually means the flip-flops are not clearing properly before you load new data.
Here’s a quick table to help you spot problems:
| Problem | Possible Cause | Quick Fix |
|---|---|---|
| No output | Bad flip-flops wiring | Check connections |
| Flickering LEDs | Unstable clock signal | Use a clean clock source |
| Wrong sequence | Flip-flops in wrong order | Recheck wiring |
| Data not shifting | Loose flip-flops connection | Secure all wires |
Tip: Always double-check your flip-flops and clock lines before testing your circuit.
Tips for Beginners
You can avoid most problems with a few simple habits. Try these tips when you build with shift registers:
Start Small:
Begin with just a few flip-flops. You can add more once you see your circuit working.Use Clear Clock Pulses:
Make sure your clock signal is steady. Flip-flops need a clean pulse to shift data correctly.Label Your Wires:
It helps to mark which wire goes to each flip-flop. This makes troubleshooting much easier.Test One Step at a Time:
After you connect each flip-flop, test your circuit. You can spot mistakes early.Watch for Heat:
If your flip-flops get hot, you might have a short circuit. Turn off power and check your setup.Read the Datasheet:
Every flip-flop and shift register has a datasheet. You can find pinouts and timing diagrams there.Ask for Help:
If you get stuck, ask a friend or search online. Many people have solved the same flip-flops problems before.
Remember: Flip-flops are the heart of your shift register. Treat them with care, and your projects will work smoothly! 😊
You now know what shift registers do and why they matter. You can use them in many projects, from lighting up LEDs to building memory circuits. Shift registers show up everywhere in digital electronics because they are fast, simple, and save space.
Linear Feedback Shift Registers help create random numbers, protect data in networks, and power secure phone calls. They use just a few parts but can make over a million unique patterns with only 20 bits.
Ready for more? Try these next steps:
Build a Serial In Parallel Out register and watch how data moves.
Explore Parallel In Serial Out designs and see how you can send lots of data with one wire.
Experiment with bidirectional registers for even more control.
Check out barrel shifters if you want to dive into advanced digital tricks.
Keep exploring! Shift registers open the door to bigger and cooler electronics projects.
FAQ
What is the main job of a shift register?
A shift register stores and moves digital bits. You can use it to organize data, send it out one bit at a time, or collect it all at once. It helps you control and manage digital signals.
Can I connect more than one shift register together?
Yes! You can chain shift registers to control more outputs or read more inputs. Just connect the output of one to the input of the next. This way, you can handle lots of LEDs or buttons with just a few pins.
Why do my LEDs flicker when I use a shift register?
Flickering usually means your clock signal is not steady. Make sure your clock wire is secure and your code sends clear pulses. If you use an Arduino, double-check your wiring and try slowing down your code.
Do I need to use resistors with LEDs and shift registers?
Yes, you should always use resistors with LEDs. Resistors protect your LEDs from too much current. Without them, your LEDs might burn out or your shift register could get damaged.
 UTMEL
UTMEL
We are the professional distributor of electronic components, providing a large variety of products to save you a lot of time, effort, and cost with our efficient self-customized service. careful order preparation fast delivery service
 Improving the Energy Conversion Efficiency of Triboelectric NanogeneratorsSaumitra Jagdale19 November 20242577
There is a huge growth in demand for self-sustaining electronic devices, as the traditional power-generating devices fail in remote and harsh environments due to the periodic requirement of battery changes. Also, these devices are frequency specific; some work only in high frequency and some in low frequency. Triboelectric nanogenerators (TENGs) provide a promising solution by efficiently converting mechanical energy into electricity as they are versatile, compact, and cheap, making them a popular choice.
Read More Methodologies for Increasing Efficiency of Fuel Stack Technology for Energy GenerationSaumitra Jagdale19 November 20242597
Presently, power companies are moving towards renewable energy systems. Conventional energy sources are more expensive because they require a vast network to be maintained and huge human resources. Also, they harm the environment by releasing several harmful gases. As the industry’s focus shifts toward renewable energy sources, energy systems powered by Proton Exchange Membrane Fuel Stacks (PEMFS) are gaining traction.
Read More Reconfigurable Antennas: Improving Efficiency in Modern CommunicationRakesh Kumar, Ph.D.24 December 20242522
This article highlights the limitations of conventional antennas and discusses the advantages of reconfigurable antenna designs. It also explores various reconfiguration techniques, applications, and their potential to enhance efficiency.
Read More The Ultimate Guide to AI Noise Reduction Translation EarbudsUTMEL01 April 20256785
In today’s connected world, talking to others is very important. You’ve likely seen how global business, travel, and learning need easy chats in different languages. This need keeps growing because of new tech like 5G and edge computing. These make fast and smooth connections possible.
Read More Comparing Popular Jumper Wires for Electronics ProjectsUTMEL10 July 20251646
Compare top jumper wires for electronics projects in 2025. Explore options by material, length, gauge, and durability to find the best fit for your needs.
Read More
Subscribe to Utmel !
![TP920]() TP920
TP920Fluke Electronics
![CT-900LPHPH]() CT-900LPHPH
CT-900LPHPHPanduit Corp
![P25-1223]() P25-1223
P25-1223Harwin Inc.
![0253-01NH-6]() 0253-01NH-6
0253-01NH-6Greenlee Communications
![HR10-10J-T04]() HR10-10J-T04
HR10-10J-T04Hirose Electric Co Ltd
![2063229-1]() 2063229-1
2063229-1TE Application Tooling
![5689A]() 5689A
5689APomona Electronics
![1205765]() 1205765
1205765Phoenix Contact
![1205778]() 1205778
1205778Phoenix Contact
![72923-0]() 72923-0
72923-0Pomona Electronics