
 Product
 Brand
Brand Articles
 Tools
Tools
Detailed Introduction of the Chip Design Process
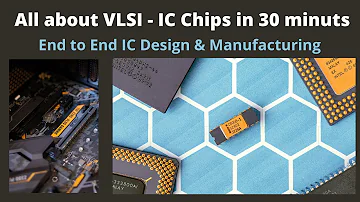
IC Design & Manufacturing Process: Beginners Overview to VLSI
Catalog |
The chip is one of the greatest inventions of our time. Without the advent of chips, it would be hard for us to imagine what the current electronic age would be like. It is precisely because of the invention of the chip that all functions are concentrated in a small chip.
Ⅰ Chip concept explanation
A chip is a carrier of an integrated circuit, which is divided from a wafer and is generally an important part of a computer or other electronic equipment. Simply put, the chip integrates the electronic components such as resistors and capacitors that we can see everywhere and the circuits composed of them into a small particle. The process of chip manufacturing is like building a house with building blocks. First, the wafer is used as the foundation, and by stacking layer after layer, you can complete your desired shape (that is, various types of chips). The chip is a very precise instrument, and its unit is nanometers. For an ordinary Intel Core CPU, the size of the core part is similar to a human fingernail, but it integrates billions or even tens of billions of transistors. There are many types of chips. A series of interrelated chips can be combined into a chipset. They depend on each other and can play a greater role when combined. For example, the signal transmitting and receiving module in a smartphone is composed of multiple chips. Larger integrated circuits together.

IC and PCB (source: Aijaz Fatima)
Chips are widely used in our daily lives, and different types of chips play different roles. The chip is like a human brain, receiving information, issuing instructions, and controlling human behavior. If the CPU is likened to the brain of the entire computer system, then the chipset composed of the CPU and other chips constitutes the torso of the entire body. For computers, the chipset almost determines the functions of the entire system. Not only do smart products such as mobile phones and computers contain chips, it can be said that as long as some more complex functions are involved, they will be used.
Ⅱ Classification of chips
The following figure shows the classification of common chips, including ASIC, ASSP, SoC, FPGA, SoC FPGA, μcontroller, μprocessor, etc.

common ICs
ASIC (application-specific integrated circuit) is an integrated circuit specially constructed for a specific application or purpose. Compared with programmable logic devices or standard logic integrated circuits, ASICs can increase speed because they are specifically designed to accomplish one thing and can do this. It can also be made smaller and consume less electricity. The disadvantage of this circuit is that it can be more expensive to design and manufacture, especially if only a few units are needed.
ASIC can be found in almost any electronic device, and its uses range from the custom rendering of images to sound conversion. Since ASICs are custom-made, they can only be used by the company that designed them, so they are considered proprietary technologies.
ASSP: Application Specific Standard Product. The design and implementation of the application-specific standard product (ASSP) are exactly the same as ASIC. This is not surprising, because they are essentially the same thing. The only difference is that ASSP is a more versatile device, suitable for multiple system design studios. For example, an independent USB interface chip can be classified as ASSP.
SOC is the abbreviation of System on Chip. Since it is a system, a single cannot be called a system. Only a combination of multiple individuals can be called a system. Therefore, the SOC emphasizes a whole. SoC imitates a computer system and is reduced to a microsystem. In the SOC chips I have contacted, the approximate components of the hardware are core, storage, peripheral interfaces (high-speed peripherals and low-speed peripherals), bus, interrupt module, clock module, etc.
FPGA (Field Programmable Gate Array): A field-programmable gate array (FPGA) is a semiconductor device composed of a matrix of configurable logic blocks (CLB) connected by programmable interconnects. After the FPGA is manufactured, it can be reprogrammed according to the required application or functional requirements. This feature is the key to distinguishing FPGA from application-specific integrated circuits (ASICs). You can tailor FPGA devices for specific design tasks. Although there are one-time programmable (OTP) FPGAs on the market, most of them are based on SRAM and can be reprogrammed as the design evolves.
Programmable SoC or SoC FPGA: An IC that integrates a processor and FPGA architecture is called a programmable SoC or SoC FPGA. This also includes peripherals, on-chip memory, FPGA-style logic arrays, and high-speed transceivers. It’s mainly used in networks, aerospace, national defense, etc.
Microprocessor (μP or MPU): An IC that only contains a processor is called a microprocessor. It does not contain memory (RAM, ROM, etc.) or any other peripheral devices.
Microcontroller (μC or MCU): An IC containing a processor, memory (RAM, ROM, etc.), and other peripherals is called a microcontroller. This is a general-purpose device and needs to be programmed for the application. Microcontrollers can be used in various industrial products. The microcontroller is a reduced version of the SoC.
Ⅲ How is the chip designed and manufactured?
Chip Design

IC design flow Source: einfochips
Specification development
Within a chip design company, the first step in designing a chip is to draft a proposal through management and data analysis so that the design can meet industry segmentation requirements from the beginning. At this time, high-level designers will have a meeting to conduct feasibility analysis, and on this basis, determine the function and operating mode of the chip, and determine the performance, function, physical size, manufacturing technology, and design technology, and other main design parameters.
Architecture definition
Define the basic specifications of the system, such as floating-point units; determine the system to be used, such as reduced instruction set computer (RISC) or complex instruction set computer (CISC); finalize the number of ALU cache sizes, etc.
Feature design
Define the main functional units of the system to help identify the interconnection requirements between the units, as well as the physical and electrical specifications of each unit.
Logical design
Develop Boolean expressions, control flow, word width, register allocation, etc., and use VHDL or Verilog HDL hardware description language to describe functions in codes to form register transfer level (RTL) codes.
Circuit design
The logic design gives a simplified logic implementation, while the circuit design further expresses the logic in the form of a netlist. The netlist is usually composed of gates, transistors, and various interconnections. The effect of the circuit design can be obtained by simulation.
Physical design
In this step, the conversion of the netlist to its geometric representation is realized, and the result is called the layout, which can verify the synthesized netlist functionally. This step follows some predefined fixed rules, such as the lambda rule, which provides exact details such as component size, scale, and spacing. The next step is to verify the functions and timing of the physical layout of the completed wiring. The verification items usually include LVS, DRC, ERC, etc., and of course some power consumption analysis and manufacturability analysis.
Design process export
This is the last step of chip design. The design process file is exported according to the requirements of the chip foundry. The design company retains the original design draft and can make flexible modifications, while the relatively finalized process file—physical layout is based on GDS II files. The format is handed over to the chip foundry as the manufacturing basis.
Manufacturing and testing

chip process flow Source: Joseph A. Elias, PhD
Refining monocrystalline silicon ingots
Sand is the cheapest source of silicon, so the silicon used in semiconductor materials is extracted from sand (SiO₂). Usually, the company that produces monocrystalline silicon ingots extracts the silicon element from the sand and then obtains electronic grade silicon (EGS) with a purity of 99.9999% after high-temperature shaping and multiple purifications. Then melt the pure silicon in a pot at 1400ºC, insert a small seed crystal containing the desired crystal orientation into the molten silicon, and then slowly (1 mm/min) pull out, so that the silicon crystal is made into a cylindrical shape Single crystal silicon ingot. The weight of a single single crystal silicon ingot is about 100 kg.
Wafer processing
Wafer processing mainly consists of two steps. The first step is to saw the monocrystalline silicon ingot into a disc horizontally, then polish and crystallize it to obtain a mirror-like wafer. The second step is to thermally oxidize the wafer. At this time, pure silicon will go through a high-temperature furnace filled with oxygen to form a very thin layer of silicon dioxide on the surface as the gate oxide layer of the transistor.
Photolithography
The so-called photolithography process includes two parts: masking and photoetching. First, apply photoresist with photoresist ability to the wafer to form a circuit pattern on the surface of the silicon substrate, and then use a photoaligner to align the wafer with the mask, and the wafer will pass through the hollowed-out part of the mask. When exposed to ultraviolet light, the exposed part of the photoresist becomes soluble, so that the circuit structure on the mask is temporarily copied to the silicon substrate.
Etching
According to the circuit structure engraved by the photoetching machine, micro-engraving is carried out on the silicon wafer to engrave grooves or contact holes. Specifically, etching is to use the developed photoresist pattern as a mask, and then use chemical liquid or plasma to etch away a certain depth of thin film material on the substrate, and then obtain the same integrated circuit pattern as the photoresist pattern.
Ion Implantation
Ion implantation is an important doping technology in the chip manufacturing process, and it is also an important means of controlling the threshold voltage of the MOSFET. Usually in a vacuum and low temperature environment, the impurity ions of phosphine or boron trichloride are accelerated to obtain impurity ions with a certain kinetic energy, and then the ion beam is photographed onto a wafer covered with a photoresist mask. The part covered by the photoresist, the ion beam cannot penetrate the photoresist and is blocked; the part not covered, the ion beam will be implanted into the substrate to achieve doping, and the doping depth depends on the ion beam energy. Finally, after the ion implantation is completed, the photoresist must be thoroughly removed before proceeding to the next step.
Metalization
Metallization refers to the process of depositing a metal film on a wafer by means of deposition, etc., and then forming surface metal connections through metal film photolithography to connect various components together. Therefore, the first step is to etch the contact holes. The second step is to prepare a metal film. The main conductive metal material may be aluminum alloy or gold. The methods usually include evaporation, sputtering, metal CVD, and electroplating. At present, metal CVD has strong step coverage and good high aspect ratio. Contact and gapless filling characteristics are widely used. The third step is to use photolithography and etching processes or stripping techniques to remove parts other than the wiring to form interconnected metal wires. The fourth step is to carry out alloying heat treatment to ensure good conductivity between the chip and the metal. The last is planarization, which reduces the damage to the accuracy of light propagation caused by the unevenness of the wafer surface, thereby affecting its accurate pattern production. This process will not only be used in the surface layer, but also in the middle layer when the metal layer is increased.
Wafer test
After the wafer carrying the integrated circuit is processed, it needs to be tested. The main purpose is to reduce the cost of packaging and to screen out problematic integrated circuit modules (chip prototypes) early. The specific operation is to use the probe test platform to test the electrical performance of the chip prototype according to the pre-defined test points in the cleanroom. The test can perform a one-time test on the wafers on the test platform through the jig, without having to perform the chip one by one, so the test efficiency is high.
Cutting and packaging
Each wafer contains hundreds to tens of thousands of chips. The wafer is cut into individual pieces with a diamond saw, undergoes a thinning process, and then electrical tests are performed on each individual chip (chip). If there is a problem with the test result, the chip will be discarded; if the test result is satisfactory, the chip will be sent for packaging. Before packaging, a microscope will be used to re-inspect the chip, and only the chips that pass the re-inspection will be truly packaged.
Package test
For the chip, the pre-factory test mainly includes three aspects. The first two are wafer test and chip test, which have been described in the previous section (see "Cutting and Packaging" chapter). The focus here is actually the third test: packaging test, which is the test before the chip leaves the factory. According to statistics, these three tests will account for as much as 1/4 to 1/2 of the entire chip production cost.
At this time, the chip to be tested has been wrapped in a layer of packaging and is not so fragile. Therefore, the requirements for the test environment are not so strict, and there is no need for cleanroom testing. However, for packaging testing, due to the obstruction of the package itself, the test probe cannot touch the inside of the chip, and the test range is limited, and the complexity of the test is also increased.
General chip packaging tests include multiple electrical characteristics tests such as power consumption, heat generation, operating speed, and withstand voltage in various environments. In the testing process, a large number of programming and programming verification procedures are often required. Sometimes, according to the customer's requirements, some targeted tests will be done to see if the customer's needs are met. When the test results are normal, the chip will be marked with silk screens such as specification, model, and date of manufacture, and it will be packaged and shipped.
Ⅳ Summary
There are many types of ICs, and each type of IC has certain characteristics: programmable or non-programmable, with or without a processor, high or low speed, compact or bulky. The process of designing, manufacturing, and testing ICs is complex and detailed. The main contributors are the design and verification team, IP vendors, and IC manufacturers. Advanced EDA tools play a vital role in reducing the time and effort associated with the IC design cycle.
 UTMEL
UTMEL
We are the professional distributor of electronic components, providing a large variety of products to save you a lot of time, effort, and cost with our efficient self-customized service. careful order preparation fast delivery service
1. What software is used for chip design?
Cadence is the most widely used, and the most professional, software for IC layout designing, however, there are many other tools like mentor graphics tool, tanner, and also other open-source tools like glade, and electric.
2. What is digital chip design?
Digital IC design is a procedural process that involves converting specifications and features into digital blocks and then further into logic circuits. Many of the constraints associated with digital IC design come from the foundry process and technological limitations.
 Discovering New and Advanced Methodology for Determining the Dynamic Characterization of Wide Bandgap DevicesSaumitra Jagdale15 March 20242673
For a long era, silicon has stood out as the primary material for fabricating electronic devices due to its affordability, moderate efficiency, and performance capabilities. Despite its widespread use, silicon faces several limitations that render it unsuitable for applications involving high power and elevated temperatures. As technological advancements continue and the industry demands enhanced efficiency from devices, these limitations become increasingly vivid. In the quest for electronic devices that are more potent, efficient, and compact, wide bandgap materials are emerging as a dominant player. Their superiority over silicon in crucial aspects such as efficiency, higher junction temperatures, power density, thinner drift regions, and faster switching speeds positions them as the preferred materials for the future of power electronics.
Read More A Comprehensive Guide to FPGA Development BoardsUTMEL11 September 202520493
This comprehensive guide will take you on a journey through the fascinating world of FPGA development boards. We’ll explore what they are, how they differ from microcontrollers, and most importantly, how to choose the perfect board for your needs. Whether you’re a seasoned engineer or a curious hobbyist, prepare to unlock new possibilities in hardware design and accelerate your projects. We’ll cover everything from budget-friendly options to specialized boards for image processing, delve into popular learning paths, and even provide insights into essential software like Vivado. By the end of this article, you’ll have a clear roadmap to navigate the FPGA landscape and make informed decisions for your next groundbreaking endeavor.
Read More 800G Optical Transceivers: The Guide for AI Data CentersUTMEL24 December 202510802
The complete guide to 800G Optical Transceiver standards (QSFP-DD vs. OSFP). Overcome supply shortages and scale your AI data center with Utmel Electronic.
Read More The 2026 Engineer’s Guide: Choosing the Right MCU for Your Next IoT & New Energy ProjectUTMEL30 April 2026885
A comprehensive comparison of 2026's leading MCUs from ST, NXP, and Microchip across power efficiency, processing performance, connectivity, and ecosystems to help engineers select the optimal chip for next-gen IoT and new energy projects.
Read More AI Server Components: Engineering Next-Gen Data Center Hardware for 100kW RacksUTMEL15 May 2026426
The transition from traditional enterprise IT to AI-driven workloads has rendered legacy data center hardware obsolete, forcing infrastructure planners to re-engineer server components for extreme thermal environments.
Read More
Subscribe to Utmel !
![AT88SC25616C-PU]() AT88SC25616C-PU
AT88SC25616C-PUMicrochip Technology
![FM3164-G]() FM3164-G
FM3164-GCypress Semiconductor Corp
![HCS301-I/P]() HCS301-I/P
HCS301-I/PMicrochip Technology
![L9660TR]() L9660TR
L9660TRSTMicroelectronics
![MOC3062VM]() MOC3062VM
MOC3062VMON Semiconductor
![MOC3020SR2M]() MOC3020SR2M
MOC3020SR2MON Semiconductor
![FGBS3040E1-F085]() FGBS3040E1-F085
FGBS3040E1-F085ON Semiconductor
![ATSHA204-TSU-T]() ATSHA204-TSU-T
ATSHA204-TSU-TMicrochip Technology
![AD8196ACPZ]() AD8196ACPZ
AD8196ACPZAnalog Devices Inc.
![TLE8110EDXUMA1]() TLE8110EDXUMA1
TLE8110EDXUMA1Infineon Technologies


