
 Product
 Brand
Brand Articles
 Tools
Tools
Stop Struggling with Weak Sensor Signals: AD8032 Makes High-Speed Buffering Dead Simple

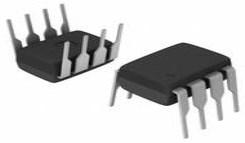
2 Channels 15mA per Channel 450nA 90 dB Instrumentational OP Amps 5V 2.7V~12V ±1.35V~6V AD8032 8 Pins 8-TSSOP, 8-MSOP (0.118, 3.00mm Width)


2 Channels 15mA per Channel 450nA 90 dB Instrumentational OP Amps 5V 2.7V~12V ±1.35V~6V AD8032 8 Pins 8-TSSOP, 8-MSOP (0.118, 3.00mm Width)
Boost weak sensor signals and build crisp active filters with the AD8032 rail-to-rail op-amp. Perfect for 3.3V/5V battery projects. Start building today.
- The Problem This Solves — and Why AD8032 Is the Answer
- 1. Meet the AD8032: What's Inside the Package?
- 2. Wiring It Up: Pinout and Connections
- 3. Getting It Running: Setup and Configuration
- 4. Project Ideas: What Can You Build?
- 5. When AD8032 Isn't Enough — Alternatives
- 6. Maker FAQ
- 7. Go Build Something
- Specifications
- Parts with Similar Specs
- Datasheet PDF
The Problem This Solves — and Why AD8032 Is the Answer
You're building a portable, battery-powered data logger, and your high-speed sensors (like a photodiode or ultrasonic receiver) are outputting signals so weak your Arduino's ADC can barely register them. You need an amplifier that's blazingly fast, doesn't drain your battery, and works flawlessly on a standard 3.3V or 5V single supply.
Enter the AD8032: a dual, 80 MHz high-speed operational amplifier that delivers rail-to-rail input and output while sipping just 800 µA of current per channel.
What it does in plain English: It takes tiny, fast-moving electrical signals and makes them strong enough for your microcontroller to read, without clipping the top or bottom of the wave.
Who it's perfect for: Intermediate to advanced makers, synth DIYers, and prototypers building battery-powered analog front-ends.
Why not just use an LM358? The classic LM358 is great, but it's slow (1 MHz vs the AD8032's 80 MHz) and it isn't rail-to-rail, meaning you lose precious voltage range on a 3.3V system.
Availability note: Highly available. Standard stock on major distributor platforms like Mouser and DigiKey.

1. Meet the AD8032: What's Inside the Package?
You're trying to capture a high-speed pulse from a laser tripwire to trigger a camera flash, but the signal drops out before the microcontroller even sees it. This happens because high-speed signals degrade quickly if they aren't buffered. The AD8032 sits between your sensor and your microcontroller, acting like a high-speed bouncer that ensures the signal arrives strong and intact.
1.1 The Core Capability in Plain English
At its heart, the AD8032 is a "voltage feedback amplifier." Think of it as a perfectly clean magnifying glass for electricity. Because it is "rail-to-rail," if you power it with 5V, it can output a signal that goes almost all the way down to 0V and all the way up to 5V. Older op-amps would clip the signal at 1V and 4V, ruining your sensor readings.
1.2 The Numbers That Actually Matter
Don't get bogged down in the 20-page datasheet. Here are the specs that will actually dictate how you build your project:
| What You Care About | The Value | Why It Matters for Your Project |
|---|---|---|
| Supply Voltage | 2.7V to 12V | Perfect for 3.3V (ESP32/Pico), 5V (Arduino), or 9V battery systems. |
| Bandwidth | 80 MHz | It can handle incredibly fast signals (like video or RF) without breaking a sweat. |
| Slew Rate | 30 V/µs | How fast the output can change. 30V per microsecond means crisp, sharp square waves. |
| Supply Current | 800 µA per amp | It barely sips power. Your battery-powered remote sensors will run for months. |
1.3 What Can It Talk To?
The AD8032 is a purely analog chip—it doesn't speak I2C or SPI. Instead, it speaks the universal language of raw voltage. You'll connect its output directly to the Analog-to-Digital Converter (ADC) pins on your Arduino, ESP32, or Raspberry Pi Pico.

2. Wiring It Up: Pinout and Connections
Wiring an op-amp can feel like a dark art, but the AD8032 uses an industry-standard dual op-amp layout. If you've wired one dual op-amp, you know how to wire this one.
2.1 The Pins You'll Actually Use

Because it's a dual op-amp, there are two independent amplifiers (A and B) inside one chip. Here is how you wire Amplifier A as a simple buffer for a 5V Arduino or 3.3V ESP32:
| AD8032 Pin | Connect To (Arduino Uno) | Connect To (ESP32) | Notes |
|---|---|---|---|
| Pin 8 (+Vs) | 5V | 3.3V | Main power in. Crucial: Add a 0.1µF capacitor to GND nearby! |
| Pin 4 (-Vs) | GND | GND | Connect to common ground for single-supply setups. |
| Pin 3 (IN+ A) | Sensor Output | Sensor Output | The weak signal from your sensor goes here. |
| Pin 2 (IN- A) | Connect to Pin 1 | Connect to Pin 1 | Tying IN- to OUT creates a "unity gain buffer". |
| Pin 1 (OUT A) | Analog Pin (e.g., A0) | Analog Pin (e.g., GPIO 34) | The strong, buffered signal goes to your microcontroller. |
2.2 Which Version Should You Buy?
DIP-8 (AD8032ANZ): The maker's best friend. It has legs and plugs directly into standard breadboards.
SOIC-8 (AD8032ARZ): A surface-mount version. Great if you are designing your own custom PCB and want to save space, but requires soldering skills.
2.3 Decoding the Part Number
Notice the "Z" at the end of the part numbers? In Analog Devices' naming scheme, the "Z" simply means the part is RoHS compliant (lead-free). Always aim for the Z variants for modern builds!
3. Getting It Running: Setup and Configuration
Maker Tip: Power it up with a multimeter before connecting the output to your microcontroller. If your wiring is wrong and it outputs 9V into your 3.3V ESP32, you'll fry your board. Measure twice, connect once!
3.1 Minimum Viable Circuit
To make the AD8032 work without pulling your hair out, you need: 1. The chip itself. 2. A 0.1µF ceramic bypass capacitor placed as physically close to Pin 8 and Pin 4 as possible. High-speed op-amps will oscillate and act crazy without this capacitor. 3. If setting up a buffer, a 1.5kΩ resistor in the feedback loop (between Pin 1 and Pin 2) rather than a direct wire. This prevents high-frequency ringing.
3.2 Starter Code
Because the AD8032 does its magic in hardware, your microcontroller code is beautifully simple. It just reads the newly strengthened analog signal.
// AD8032 Analog Read Example (Arduino)
// The AD8032 is buffering a fast-changing sensor on Pin A0

const int sensorPin = A0;
int sensorValue = 0;

void setup() {
  Serial.begin(115200); // Use a fast baud rate for high-speed signals

  // Optional: If you want to increase Arduino ADC speed,
  // you'd manipulate ADC prescalers here.
}

void loop() {
  // The AD8032 ensures this reading is stable and doesn't droop!
  sensorValue = analogRead(sensorPin);

  Serial.println(sensorValue);
  delay(2); // Small delay for serial stability
}
3.3 The 3 Most Common Mistakes (and How to Avoid Them)
| Mistake | Symptom | Fix |
|---|---|---|
| Direct Feedback Short | The output oscillates wildly or gets very hot. | High-speed op-amps hate direct wire shorts in the feedback loop. Use a ~1.5kΩ resistor between OUT and IN- instead of a plain wire. |
| Missing Bypass Caps | Signal looks incredibly noisy on an oscilloscope. | Place a 0.1µF ceramic capacitor directly across the +Vs and -Vs pins to smooth out power ripples. |
| LTspice Simulation Fails | "Convergence errors" when simulating your circuit in LTspice. | The AD8032 SPICE model can be picky. Use the universal opamp2 symbol and add the SPICE directive .options Gmin=1e-11. |
4. Project Ideas: What Can You Build?
Now that you have a high-speed, low-power buffer in your toolkit, a whole new tier of projects opens up.
4.1 Quick-Start Project: Laser Tripwire Array
Want to build a high-speed timing gate for a slot car track or a DIY drone race? A standard photoresistor is too slow. You need a photodiode, but photodiodes output very weak currents.
The Build: Wire a photodiode to the AD8032 configured as a transimpedance amplifier (TIA). The AD8032 will instantly convert those micro-amps of current into a crisp 0-5V square wave every time the laser beam is broken. Because of the 30 V/µs slew rate, the rising edge of your signal will be razor-sharp, allowing your Arduino to trigger an interrupt with microsecond accuracy.
4.2 More Ideas to Explore
Portable Oscilloscope Front-End: Buffer the inputs for a Raspberry Pi Pico-based DIY oscilloscope.
Active Audio Crossovers: Build low-power, distortion-free filters for a portable battery-powered Bluetooth speaker.
Ultrasonic Receiver: Amplify the weak echoes from 40kHz ultrasonic transducers for custom radar projects.
DIY Bio-Sensors: Buffer high-impedance signals for custom ECG/EKG heart monitors safely on battery power.
5. When AD8032 Isn't Enough — Alternatives
The AD8032 is fantastic, but no single chip does everything. Here is how to pivot if your project needs change:
If you need more speed: Step up to the Analog Devices AD8066 (145 MHz bandwidth).
If you need to cut costs: If your signal is slow (like a temperature sensor), save money and use the classic LM358.
If you need a digital output: If you just want a simple ON/OFF signal (like a threshold detector) rather than an analog wave, use a comparator like the LM393.
Direct drop-in replacements: The Burr-Brown OPA2350 or Linear Technology LT1630 offer similar pin-compatible rail-to-rail performance.
6. Maker FAQ
Q: How do I connect AD8032 to an Arduino? Wire the AD8032's power pins to the Arduino's 5V and GND. Connect your sensor to the op-amp's inputs, and route the op-amp's output pin directly to an Arduino Analog pin (like A0).
Q: Can I use AD8032 with a 3.3V system like ESP32 or Raspberry Pi Pico? Absolutely. The AD8032 operates on single supplies as low as 2.7V, making it perfect for 3.3V microcontrollers.
Q: Why is my AD8032 getting hot / not responding? You might have a counterfeit part (always buy from authorized distributors like Mouser or DigiKey), or it is oscillating. Ensure you have bypass capacitors installed and avoid tying the output directly to the inverting input without a resistor.
Q: What's the difference between AD8032 and the LM358? Speed and voltage range. The AD8032 is 80 times faster (80 MHz vs 1 MHz) and can swing its output all the way to the power rails, whereas the LM358 will clip your signal before it reaches 5V.
Q: What if I have headroom distortion? If your signal is clipping, ensure your input signals are offset to match the mid-supply voltage (e.g., 2.5V on a 5V system) to maximize your headroom.
7. Go Build Something
Stop letting weak signals dictate what you can and can't build. With the AD8032 in your parts bin, you have the analog muscle to tackle high-speed sensors, crisp audio filters, and battery-powered precision instruments. Grab a breadboard, wire up a buffer, and watch your microcontroller finally see the signals it’s been missing.
Datasheets & Models: Check Analog Devices' official site for the full datasheet and LTspice models.
Community: Got an awesome high-speed sensor build? Share your schematic and code on forums like Reddit's r/arduino or Hackaday!
Specifications
Parts with Similar Specs
- ImagePart NumberManufacturerPackage / CaseNumber of PinsSlew RateGain Bandwidth ProductInput Offset Voltage (Vos)Power Supply Rejection Ratio (PSRR)Common Mode Rejection RatioSupply VoltageView Compare
![AD8032ARMZ-REEL7]()
AD8032ARMZ-REEL7
8-TSSOP, 8-MSOP (0.118, 3.00mm Width)
8
35V/μs
40 MHz
1.5 mV
86 dB
90 dB
5 V
![AD8652ARMZ-REEL]()
8-TSSOP, 8-MSOP (0.118, 3.00mm Width)
8
41V/μs
50MHz
350 μV
94 dB
95 dB
5 V
![LTC6244HMS8#PBF]()
8-TSSOP, 8-MSOP (0.118, 3.00mm Width)
8
41V/μs
-
350 μV
94 dB
95 dB
5 V
![AD8652ARMZ]()
8-TSSOP, 8-MSOP (0.118, 3.00mm Width)
8
35V/μs
-
150 μV
85 dB
85 dB
2.5 V
![LMP7718MM/NOPB]()
MSOP
8
40 V/μs
30 MHz
40 μV
75 dB
74 dB
-


Datasheet PDF
- Datasheets :
- PCN Assembly/Origin :
- ConflictMineralStatement :
 6N139 Optocoupler: Pinout, Applications and Datasheet
13 August 20212550
 STM32F401RET6TR Microcontroller: 32-Bit, 64-LQFP, Pinout and Features
21 January 20221929
![LS14500 3.6 V AA Lithium Battery 2.6 Ah[Video+FAQ]](https://res.utmel.com/Images/Article/e56d6782-c55e-4720-a448-6da3b6402280.png) LS14500 3.6 V AA Lithium Battery 2.6 Ah[Video+FAQ]
LS14500 3.6 V AA Lithium Battery 2.6 Ah[Video+FAQ]23 April 2022431
 LM7812 Positive Voltage Regulators: Specifications, Pinout and Datasheet
13 August 202118920
 CD4050 hex buffer:Pinout, Alternatives, Datasheet PDF
02 July 20214941
 AK4458VN 32-bit 8ch Premium DAC, 115dB 768kHz, 48-pin QFN AKM DAC
09 February 20223824
 74HC14 Schmitt Trigger: Datasheet, Pinout and Application
28 October 202123743
 AT28BV256 EEPROMs: Pinout, Equivalent and Datasheet
20 December 2021887
 What are the Commonly Used Anti-Jamming Technologies for Sensors?
27 December 20211442
 Ten Smart Sensor Technology Trends for IoT Applications
20 November 20216303
 Robotics and Semiconductor Industries Face Challenges and Opportunities
09 September 20233731
 Emerging Trends in Complex Programmable Logic Devices Market 2025
16 June 2025861
 Introduction to PIC Microcontroller: Architecture, Features, and Applications
08 April 202512860
 LLC Converter with Planar Matrix Transformer for High-Current-High-Power Applications
15 March 20244769
 MediaTek, Qualcomm Announce Joining Russia Sanctions
10 March 20226112
 Why Meta Did Not Choose Qualcomm AI Chip?
02 April 20225916
Analog Devices Inc.
In Stock: 238
United States
China
Canada
Japan
Russia
Germany
United Kingdom
Singapore
Italy
Hong Kong(China)
Taiwan(China)
France
Korea
Mexico
Netherlands
Malaysia
Austria
Spain
Switzerland
Poland
Thailand
Vietnam
India
United Arab Emirates
Afghanistan
Åland Islands
Albania
Algeria
American Samoa
Andorra
Angola
Anguilla
Antigua & Barbuda
Argentina
Armenia
Aruba
Australia
Azerbaijan
Bahamas
Bahrain
Bangladesh
Barbados
Belarus
Belgium
Belize
Benin
Bermuda
Bhutan
Bolivia
Bonaire, Sint Eustatius and Saba
Bosnia & Herzegovina
Botswana
Brazil
British Indian Ocean Territory
British Virgin Islands
Brunei
Bulgaria
Burkina Faso
Burundi
Cabo Verde
Cambodia
Cameroon
Cayman Islands
Central African Republic
Chad
Chile
Christmas Island
Cocos (Keeling) Islands
Colombia
Comoros
Congo
Congo (DRC)
Cook Islands
Costa Rica
Côte d’Ivoire
Croatia
Cuba
Curaçao
Cyprus
Czechia
Denmark
Djibouti
Dominica
Dominican Republic
Ecuador
Egypt
El Salvador
Equatorial Guinea
Eritrea
Estonia
Eswatini
Ethiopia
Falkland Islands
Faroe Islands
Fiji
Finland
French Guiana
French Polynesia
Gabon
Gambia
Georgia
Ghana
Gibraltar
Greece
Greenland
Grenada
Guadeloupe
Guam
Guatemala
Guernsey
Guinea
Guinea-Bissau
Guyana
Haiti
Honduras
Hungary
Iceland
Indonesia
Iran
Iraq
Ireland
Isle of Man
Israel
Jamaica
Jersey
Jordan
Kazakhstan
Kenya
Kiribati
Kosovo
Kuwait
Kyrgyzstan
Laos
Latvia
Lebanon
Lesotho
Liberia
Libya
Liechtenstein
Lithuania
Luxembourg
Macao(China)
Madagascar
Malawi
Maldives
Mali
Malta
Marshall Islands
Martinique
Mauritania
Mauritius
Mayotte
Micronesia
Moldova
Monaco
Mongolia
Montenegro
Montserrat
Morocco
Mozambique
Myanmar
Namibia
Nauru
Nepal
New Caledonia
New Zealand
Nicaragua
Niger
Nigeria
Niue
Norfolk Island
North Korea
North Macedonia
Northern Mariana Islands
Norway
Oman
Pakistan
Palau
Palestinian Authority
Panama
Papua New Guinea
Paraguay
Peru
Philippines
Pitcairn Islands
Portugal
Puerto Rico
Qatar
Réunion
Romania
Rwanda
Samoa
San Marino
São Tomé & Príncipe
Saudi Arabia
Senegal
Serbia
Seychelles
Sierra Leone
Sint Maarten
Slovakia
Slovenia
Solomon Islands
Somalia
South Africa
South Sudan
Sri Lanka
St Helena, Ascension, Tristan da Cunha
St. Barthélemy
St. Kitts & Nevis
St. Lucia
St. Martin
St. Pierre & Miquelon
St. Vincent & Grenadines
Sudan
Suriname
Svalbard & Jan Mayen
Sweden
Syria
Tajikistan
Tanzania
Timor-Leste
Togo
Tokelau
Tonga
Trinidad & Tobago
Tunisia
Turkey
Turkmenistan
Turks & Caicos Islands
Tuvalu
U.S. Outlying Islands
U.S. Virgin Islands
Uganda
Ukraine
Uruguay
Uzbekistan
Vanuatu
Vatican City
Venezuela
Wallis & Futuna
Yemen
Zambia
Zimbabwe
![AD826AR-REEL7]() AD826AR-REEL7
AD826AR-REEL7Analog Devices Inc.
![AD8062ARM]() AD8062ARM
AD8062ARMAnalog Devices Inc.
![AD8532ARU-REEL]() AD8532ARU-REEL
AD8532ARU-REELAnalog Devices Inc.
![OP113ES]() OP113ES
OP113ESAnalog Devices Inc.
![SSM2142P]() SSM2142P
SSM2142PAnalog Devices, Inc.
![LTC1050CS8]() LTC1050CS8
LTC1050CS8Linear Technology/Analog Devices
![AMP02EPZ]() AMP02EPZ
AMP02EPZAnalog Devices Inc.
![AD822ARZ-REEL7]() AD822ARZ-REEL7
AD822ARZ-REEL7Analog Devices Inc.
![OP2177ARZ-REEL7]() OP2177ARZ-REEL7
OP2177ARZ-REEL7Analog Devices Inc.
![AD8066ARZ-R7]() AD8066ARZ-R7
AD8066ARZ-R7Analog Devices Inc.


