
 Product
 Brand
Brand Articles
 Tools
Tools
STMicroelectronics LIS3MDLTR Troubleshooting Guide

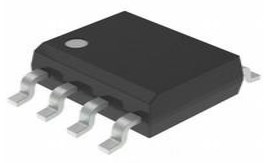
Board Mount Hall Effect / Magnetic Sensors Ultra Lo-Pwr Hi Perf 3-Axis 1.9-3.6V
Unit Price: $6.105806
Ext Price: $6.11


Board Mount Hall Effect / Magnetic Sensors Ultra Lo-Pwr Hi Perf 3-Axis 1.9-3.6V
Fix STMicroelectronics LIS3MDLTR issues: solve detection, erratic data, and calibration problems with step-by-step troubleshooting and best practices.
Product Introduction
If your stmicroelectronics lis3mdltr sensor is not working as expected, do not worry. Most problems have solutions when you follow a clear process. This 3-axis magnetometer helps you measure the Earth's magnetic field, detect magnets, and sense orientation or position. You find this sensor in smartphones, tablets, robots, drones, and even medical devices. It uses low power and offers digital output, so you can trust it for accurate and reliable readings.
Quick Checklist
Power and Wiring
Before you start troubleshooting, check the basics. Power and wiring problems cause most sensor issues. Make sure you supply the LIS3MDLTR sensor with the correct voltage. The sensor works best with a supply voltage between 1.9V and 3.6V. The typical voltage is 2.5V. If you use more than 3.6V, you risk damaging the sensor. Always connect the VDD pin to your power source and the GND pin to ground.
You need to connect the communication lines correctly. For I2C, use the SDA and SCL pins. For SPI, use SDI, SDO, and SCL. Double-check your connections against the datasheet. The LIS3MDLTR comes in a 12-pin package, so each pin has a specific function. If you wire the pins incorrectly, the sensor will not work.
Tip: Use decoupling capacitors close to the sensor’s power pins. This helps keep the voltage stable and reduces noise.
Follow the application circuit diagram from the datasheet. Connect all required pins, including any interrupt or output pins you plan to use. Make sure your wires are secure and not loose. Loose wires can cause the sensor to disconnect or give bad readings.
Software and Initialization
After checking your wiring, look at your software setup. You must initialize the sensor before you can read data. Start by setting up your microcontroller or development board to use I2C or SPI. Make sure you use the correct address for I2C. The LIS3MDLTR has a default I2C address, but you can change it by adjusting the SA1 pin.
Check your code for proper initialization commands. You need to configure the sensor’s registers to set the data rate, operating mode, and scale. If you skip this step, the sensor may not send valid data. Many libraries exist for popular platforms like Arduino or STM32. Using a tested library can save you time and prevent mistakes.
Note: Always verify that your firmware matches the sensor’s communication protocol and settings. Mismatched settings can cause the sensor to be unresponsive or give incorrect values.
If you follow these quick checks, you can solve many common problems before moving to advanced troubleshooting steps.
Common Issues
Sensor Not Detected
You may find that your LIS3MDLTR sensor does not show up when you scan for devices. This problem often happens because of I2C address conflicts or wiring mistakes. The LIS3MDLTR sensor uses a default I2C address of 0x1E. If another device on your bus uses the same address, your microcontroller cannot talk to the sensor.
Check that no other device shares the same I2C address.
Use an I2C scanner tool to see if your sensor appears on the bus.
Make sure your wiring is correct and that there are no loose connections or shorts.
If you use SPI, check that the chip select line is managed correctly and that no other device is active at the same time.
Tip: If your sensor is still not detected, try resetting it or power cycling your board.
Zero or Erratic Values
Sometimes, you may read all zeros or see values that jump around. This can happen for several reasons. Calibration mistakes, power supply problems, or electromagnetic interference (EMI) can cause these symptoms.
Here are steps you can follow to fix erratic readings:
Calibrate your LIS3MDLTR sensor using the recommended procedure.
Move your sensor away from strong magnets or electronic devices that can cause EMI.
Check that your power supply is stable and within the recommended range (1.9V to 3.6V).
Review your software setup and make sure you initialize the sensor correctly.
Note: If you use long wires or traces, signal integrity can suffer. Try to keep SPI traces shorter than 2cm and use the correct decoupling capacitor value (1uF) near the sensor.
Inaccurate Readings
You may notice that your sensor gives values that do not match the real magnetic field. This can happen if you do not calibrate the sensor or if there is interference from nearby electronics. Sometimes, the problem comes from reading the sensor data incorrectly. For example, temperature readings from the LIS3MDLTR use a special format. The sensor stores temperature data in two registers, and you must read both at the same time. If you do not follow this process, you get wrong values.
| Issue Category | Specific Problems Reported | Description |
|---|---|---|
| Hardware Design | Improper PCB layout, long SPI trace lengths (~6cm), incorrect decoupling capacitor values | Using a 2.2uF capacitor instead of 1uF or long traces can cause bad readings |
| SPI Bus Configuration | Shared SPI bus with multiple devices (3 sensors + SD card) | Sharing the bus can cause communication conflicts and inaccurate data |
| Communication Issue | No response from LIS3MDLTR sensor during SPI communication attempts | No SPI activity means the sensor is not sending data |
| Hardware Revision | Changes in capacitor value, reduced SPI trace length (<2cm), better line spacing | Following datasheet recommendations helps reduce errors |
Tip: Always check the LIS3MDLTR datasheet for the correct way to read sensor data, especially for temperature.
Unresponsive Sensor
If your sensor does not respond at all, you need to check both hardware and software. Start by making sure the power pins (VDD and VDD_IO) have the right voltage. Inspect your soldering and connections. Bad solder joints or broken traces can stop the sensor from working. If you suspect a hardware problem, try reflowing the chip or testing another board.
Check that your power supply is stable and within the correct range.
Inspect all wiring and connections for shorts or open circuits.
Perform a hardware reset of the sensor or your controller.
Make sure your software initializes the sensor and sets up communication correctly.
If you use multiple devices on the same bus, confirm that each device has a unique address or chip select.
Note: Calibrate your sensor after fixing hardware or software problems to ensure accurate output.
You may face these common issues when working with the LIS3MDLTR sensor. By following these steps, you can solve most problems and get reliable readings from your sensor.
Diagnostics
Wiring Inspection
Start your diagnostics by checking every wire and connection. Look at each pin on your LIS3MDLTR sensor. Make sure you connect the VDD pin to your power source and the GND pin to ground. Check that the SDA and SCL lines (for I2C) or SDI, SDO, and SCL lines (for SPI) are secure. Loose or swapped wires can stop your sensor from working. Use a magnifying glass to spot broken solder joints or tiny shorts. If you see any damage, fix it before moving on.
I2C/SPI Scan
You can use a simple scan to check if your microcontroller sees the sensor. For I2C, run an I2C scanner script. This script will show all devices on the bus. If you do not see the LIS3MDLTR address, check your wiring and power again. For SPI, make sure you select the right chip and that no other device is active. If you use multiple sensors, confirm that each one has a unique address or chip select.
The LIS3MDLTR sensor supports both I2C and SPI protocols. You can test these to find communication faults.
The sensor includes a self-test feature. Use this to check if the sensor hardware works.
The device can send interrupt signals when it detects a magnetic field. You can monitor these signals to see if the sensor responds.
Tip: If you have trouble, try using a different cable or breadboard.
Power and Ground Check
The LIS3MDLTR sensor works with a supply voltage between 2.5 V and 5.5 V. The ground (GND) must always be at 0 volts. Many sensor boards include a 3.3 V regulator, so you can power the sensor from a wide range of sources. Always connect the GND pin to 0 volts. If you use the wrong voltage or forget the ground, the sensor will not work.
Sensor Reset
Sometimes, your sensor may freeze or stop responding. You can reset it by turning the power off and on. Some boards have a reset pin you can use. You can also send a software reset command if your library supports it. After a reset, re-initialize the sensor in your code.
// Example: Software reset command for LIS3MDLTR
writeRegister(CTRL_REG2, 0x0C); // Set SOFT_RST and REBOOT bits
Firmware and Drivers
Check that you use the latest firmware and drivers for your microcontroller and sensor. Outdated software can cause bugs or stop the sensor from working. Download libraries from trusted sources. Review your code to make sure you set up the sensor registers correctly. If you update your firmware, test the sensor again to see if the problem is gone.
Note: Always read the LIS3MDLTR datasheet for register settings and initialization steps.
STMicroelectronics LIS3MDLTR Calibration
Proper calibration helps you get the most accurate results from your stmicroelectronics lis3mdltr sensor. If you skip this step, your readings may drift or show errors. Calibration removes small errors caused by the sensor’s environment or by how you mounted it. You should always calibrate after installing the sensor or moving it to a new location.
Calibration Tools
You can use several tools to calibrate your stmicroelectronics lis3mdltr sensor. MotionCal is a popular software that guides you through the calibration process. It works with many magnetometers and gives you easy-to-follow instructions. If you prefer coding, you can use Jupyter notebooks with Python libraries to collect and analyze sensor data. These tools help you plot the sensor’s output and adjust for any offsets or scaling errors.
Tip: Always follow the instructions for your chosen tool. Make sure your sensor is connected and sending data before you start calibration.
Here is a quick comparison of calibration tools:
| Tool | Ease of Use | Platform | Features |
|---|---|---|---|
| MotionCal | Easy | Windows/Mac | Guided steps, real-time plots |
| Jupyter Notebook | Moderate | Cross-platform | Custom analysis, scripting |
Avoiding Magnetic Interference
You need to keep your calibration area free from magnetic interference. This ensures your stmicroelectronics lis3mdltr sensor gives reliable results. To reduce interference, follow these steps:
Keep a steady distance between the sensor and any magnets. Do not place the sensor too close or too far from magnetic fields.
Align the sensor’s pin 1 with the magnetic field for best accuracy.
Mount the sensor so it does not bend or flex. Mechanical stress can change readings.
Protect the sensor from heat, moisture, and vibration.
Use mounting hardware that does not affect the sensor’s performance.
Add shielding and grounding to block electromagnetic interference, especially in noisy environments.
Use filters to cut down on electrical noise and keep your signals clean.
Note: Calibrate your sensor in the final mounting position. This helps you avoid errors from changes in the environment.
Best Practices
Handling and Mounting
You need to handle the LIS3MDLTR sensor with care. The sensor is sensitive to static electricity and physical stress. Always touch a grounded object before you pick up the sensor. This step helps prevent static discharge that can damage the chip.
When you mount the sensor, use a stable and flat surface. Secure the sensor with screws or adhesive pads. Avoid bending the sensor or the PCB. Bending can cause cracks or bad connections. Place the sensor away from strong magnets or large metal objects. These items can affect the magnetic readings.
Tip: Use non-magnetic screws and mounting hardware. Metal parts can change the sensor’s output.
You can use the following checklist for mounting:
Align the sensor’s axes with your device’s axes.
Keep the sensor level for best accuracy.
Make sure the sensor does not move after mounting.
A good mounting setup helps you get reliable and repeatable results.
Preventive Maintenance
You should check your sensor setup regularly. Dust, moisture, and vibration can cause problems over time. Clean the sensor area with a soft brush or compressed air. Do not use water or harsh chemicals.
Inspect the wires and connectors. Look for loose or corroded contacts. Replace damaged cables right away. Check the sensor’s output in your software. Watch for sudden changes or errors in the data.
| Maintenance Task | Frequency | Why It Matters |
|---|---|---|
| Clean sensor area | Monthly | Prevents dust buildup |
| Inspect wiring | Every 3 months | Avoids connection failures |
| Check data output | Weekly | Detects early sensor issues |
Note: Store spare sensors in anti-static bags. Keep them in a dry place to avoid damage.
Regular maintenance keeps your LIS3MDLTR sensor working well and extends its life.
You can solve most stmicroelectronics lis3mdltr sensor issues by following a step-by-step approach. Start with wiring checks, then review your software and calibration. For persistent problems, visit the STMicroelectronics Community forums, especially the MEMS and sensors section. You will find helpful threads, application notes, and advice from ST employees. Example code and datasheets from Adafruit, stm32duino, and GitHub projects also offer practical guidance for setup and troubleshooting.
FAQ
Why does my LIS3MDLTR sensor show all zeros?
Your sensor may not initialize correctly. Check your wiring and power supply. Make sure your code sets up the sensor registers. Try running an I2C or SPI scan to confirm your microcontroller detects the sensor.
How do I know if my sensor needs calibration?
If you see drifting or inaccurate readings, your sensor likely needs calibration. You should calibrate after moving the sensor or changing its position. Use tools like MotionCal for best results.
What should I do if my sensor gets hot?
Unplug your sensor right away. High temperature often means a wiring or voltage problem. Double-check your connections and make sure you use the correct supply voltage. Replace the sensor if it still gets hot.
Can I use the LIS3MDLTR with Arduino?
Yes, you can use this sensor with Arduino boards. Many libraries support the LIS3MDLTR. Install a library, connect the sensor, and follow example code to start reading data.
Where can I find example code for the LIS3MDLTR?
You can find example code on GitHub, the STMicroelectronics website, and Arduino forums. Search for "LIS3MDLTR example code" to get started quickly.
Specifications
- TypeParameter
- Lifecycle Status
Lifecycle Status refers to the current stage of an electronic component in its product life cycle, indicating whether it is active, obsolete, or transitioning between these states. An active status means the component is in production and available for purchase. An obsolete status indicates that the component is no longer being manufactured or supported, and manufacturers typically provide a limited time frame for support. Understanding the lifecycle status is crucial for design engineers to ensure continuity and reliability in their projects.
ACTIVE (Last Updated: 7 months ago) - Factory Lead Time16 Weeks
- Contact Plating
Contact plating (finish) provides corrosion protection for base metals and optimizes the mechanical and electrical properties of the contact interfaces.
Gold - Mount
In electronic components, the term "Mount" typically refers to the method or process of physically attaching or fixing a component onto a circuit board or other electronic device. This can involve soldering, adhesive bonding, or other techniques to secure the component in place. The mounting process is crucial for ensuring proper electrical connections and mechanical stability within the electronic system. Different components may have specific mounting requirements based on their size, shape, and function, and manufacturers provide guidelines for proper mounting procedures to ensure optimal performance and reliability of the electronic device.
Surface Mount - Mounting Type
The "Mounting Type" in electronic components refers to the method used to attach or connect a component to a circuit board or other substrate, such as through-hole, surface-mount, or panel mount.
Surface Mount - Package / Case
refers to the protective housing that encases an electronic component, providing mechanical support, electrical connections, and thermal management.
12-VFLGA - Number of Pins12
- Usage LevelIndustrial grade
- Operating Temperature
The operating temperature is the range of ambient temperature within which a power supply, or any other electrical equipment, operate in. This ranges from a minimum operating temperature, to a peak or maximum operating temperature, outside which, the power supply may fail.
-40°C~85°C TA - Packaging
Semiconductor package is a carrier / shell used to contain and cover one or more semiconductor components or integrated circuits. The material of the shell can be metal, plastic, glass or ceramic.
Tape & Reel (TR) - JESD-609 Code
The "JESD-609 Code" in electronic components refers to a standardized marking code that indicates the lead-free solder composition and finish of electronic components for compliance with environmental regulations.
e4 - Part Status
Parts can have many statuses as they progress through the configuration, analysis, review, and approval stages.
Active - Moisture Sensitivity Level (MSL)
Moisture Sensitivity Level (MSL) is a standardized rating that indicates the susceptibility of electronic components, particularly semiconductors, to moisture-induced damage during storage and the soldering process, defining the allowable exposure time to ambient conditions before they require special handling or baking to prevent failures
3 (168 Hours) - Number of Terminations12
- ECCN Code
An ECCN (Export Control Classification Number) is an alphanumeric code used by the U.S. Bureau of Industry and Security to identify and categorize electronic components and other dual-use items that may require an export license based on their technical characteristics and potential for military use.
EAR99 - HTS Code
HTS (Harmonized Tariff Schedule) codes are product classification codes between 8-1 digits. The first six digits are an HS code, and the countries of import assign the subsequent digits to provide additional classification. U.S. HTS codes are 1 digits and are administered by the U.S. International Trade Commission.
8542.39.00.01 - Voltage - Supply
Voltage - Supply refers to the range of voltage levels that an electronic component or circuit is designed to operate with. It indicates the minimum and maximum supply voltage that can be applied for the device to function properly. Providing supply voltages outside this range can lead to malfunction, damage, or reduced performance. This parameter is critical for ensuring compatibility between different components in a circuit.
1.9V~3.6V - Terminal Position
In electronic components, the term "Terminal Position" refers to the physical location of the connection points on the component where external electrical connections can be made. These connection points, known as terminals, are typically used to attach wires, leads, or other components to the main body of the electronic component. The terminal position is important for ensuring proper connectivity and functionality of the component within a circuit. It is often specified in technical datasheets or component specifications to help designers and engineers understand how to properly integrate the component into their circuit designs.
BOTTOM - Terminal Form
Occurring at or forming the end of a series, succession, or the like; closing; concluding.
BUTT - Number of Functions1
- Supply Voltage
Supply voltage refers to the electrical potential difference provided to an electronic component or circuit. It is crucial for the proper operation of devices, as it powers their functions and determines performance characteristics. The supply voltage must be within specified limits to ensure reliability and prevent damage to components. Different electronic devices have specific supply voltage requirements, which can vary widely depending on their design and intended application.
2.5V - Terminal Pitch
The center distance from one pole to the next.
0.5mm - Base Part Number
The "Base Part Number" (BPN) in electronic components serves a similar purpose to the "Base Product Number." It refers to the primary identifier for a component that captures the essential characteristics shared by a group of similar components. The BPN provides a fundamental way to reference a family or series of components without specifying all the variations and specific details.
LIS3 - Current - Supply (Max)
The parameter "Current - Supply (Max)" in electronic components refers to the maximum amount of current that a component can draw from a power supply for its operation. This parameter is critical for ensuring that the power supply can adequately meet the demands of the component without causing damage or malfunction. Exceeding this specified maximum current can lead to overheating, reduced performance, or failure of the component. It is essential to consider this value when designing or integrating components into electronic circuits to maintain reliability and functionality.
270μA Typ - Output Type
The "Output Type" parameter in electronic components refers to the type of signal or data that is produced by the component as an output. This parameter specifies the nature of the output signal, such as analog or digital, and can also include details about the voltage levels, current levels, frequency, and other characteristics of the output signal. Understanding the output type of a component is crucial for ensuring compatibility with other components in a circuit or system, as well as for determining how the output signal can be utilized or processed further. In summary, the output type parameter provides essential information about the nature of the signal that is generated by the electronic component as its output.
I2C, SPI - Supply Voltage-Max (Vsup)
The parameter "Supply Voltage-Max (Vsup)" in electronic components refers to the maximum voltage that can be safely applied to the component without causing damage. It is an important specification to consider when designing or using electronic circuits to ensure the component operates within its safe operating limits. Exceeding the maximum supply voltage can lead to overheating, component failure, or even permanent damage. It is crucial to adhere to the specified maximum supply voltage to ensure the reliable and safe operation of the electronic component.
3.6V - Supply Voltage-Min (Vsup)
The parameter "Supply Voltage-Min (Vsup)" in electronic components refers to the minimum voltage level required for the component to operate within its specified performance range. This parameter indicates the lowest voltage that can be safely applied to the component without risking damage or malfunction. It is crucial to ensure that the supply voltage provided to the component meets or exceeds this minimum value to ensure proper functionality and reliability. Failure to adhere to the specified minimum supply voltage may result in erratic behavior, reduced performance, or even permanent damage to the component.
1.9V - Analog IC - Other Type
Analog IC - Other Type is a parameter used to categorize electronic components that are integrated circuits (ICs) designed for analog signal processing but do not fall into more specific subcategories such as amplifiers, comparators, or voltage regulators. These ICs may include specialized analog functions such as analog-to-digital converters (ADCs), digital-to-analog converters (DACs), voltage references, or signal conditioning circuits. They are typically used in various applications where precise analog signal processing is required, such as in audio equipment, instrumentation, communication systems, and industrial control systems. Manufacturers provide detailed specifications for these components to help engineers select the most suitable IC for their specific design requirements.
ANALOG CIRCUIT - Max Supply Current
Max Supply Current refers to the maximum amount of electrical current that a component can draw from its power supply under normal operating conditions. It is a critical parameter that ensures the component operates reliably without exceeding its thermal limits or damaging internal circuitry. Exceeding this current can lead to overheating, performance degradation, or failure of the component. Understanding this parameter is essential for designing circuits that provide adequate power while avoiding overload situations.
270μA - Resolution
Resolution in electronic components refers to the smallest increment of measurement or change that can be detected or represented by the component. It is a crucial specification in devices such as sensors, displays, and converters, as it determines the level of detail or accuracy that can be achieved. For example, in a digital camera, resolution refers to the number of pixels that make up an image, with higher resolution indicating a greater level of detail. In analog-to-digital converters, resolution is the number of discrete values that can be represented in the digital output, determining the precision of the conversion process. Overall, resolution plays a significant role in determining the performance and capabilities of electronic components in various applications.
16 b - Sensing Method
The sensing method in electronic components refers to the technique or mechanism used to detect and measure physical phenomena such as temperature, pressure, light, or motion. This includes a variety of technologies such as resistive, capacitive, inductive, and optical sensing methods. The choice of sensing method affects the accuracy, response time, and application suitability of the electronic component. It plays a crucial role in determining how effectively a device can interact with and interpret its environment.
Magnetic - Sensing Range
The sensing range of position sensors is the displacement between the sensing face of the sensor and the approaching measurement object that triggers a signal change in the sensor.
±0.4mT, ±0.8mT, ±1.2mT, ±1.6mT - Axis
In electronic components, the parameter "Axis" typically refers to the orientation or direction along which a specific characteristic or measurement is being considered. For example, in a sensor or accelerometer, the axis may indicate the direction in which the device is measuring acceleration. In a motor or actuator, the axis may refer to the direction of movement or rotation.Understanding the axis of a component is crucial for proper installation, calibration, and operation. It helps in determining how the component will interact with other parts of a system and how its performance can be optimized. Different components may have multiple axes to consider, especially in complex systems where movement or measurements occur in multiple directions.Overall, the axis parameter provides important information about the spatial orientation or directionality of an electronic component, guiding engineers and technicians in effectively utilizing the component within a larger system.
X, Y, Z - Features
In the context of electronic components, the term "Features" typically refers to the specific characteristics or functionalities that a particular component offers. These features can vary depending on the type of component and its intended use. For example, a microcontroller may have features such as built-in memory, analog-to-digital converters, and communication interfaces like UART or SPI.When evaluating electronic components, understanding their features is crucial in determining whether they meet the requirements of a particular project or application. Engineers and designers often look at features such as operating voltage, speed, power consumption, and communication protocols to ensure compatibility and optimal performance.In summary, the "Features" parameter in electronic components describes the unique attributes and capabilities that differentiate one component from another, helping users make informed decisions when selecting components for their electronic designs.
Selectable Scale - Height1mm
- Length2mm
- Width2mm
- REACH SVHC
The parameter "REACH SVHC" in electronic components refers to the compliance with the Registration, Evaluation, Authorization, and Restriction of Chemicals (REACH) regulation regarding Substances of Very High Concern (SVHC). SVHCs are substances that may have serious effects on human health or the environment, and their use is regulated under REACH to ensure their safe handling and minimize their impact.Manufacturers of electronic components need to declare if their products contain any SVHCs above a certain threshold concentration and provide information on the safe use of these substances. This information allows customers to make informed decisions about the potential risks associated with using the components and take appropriate measures to mitigate any hazards.Ensuring compliance with REACH SVHC requirements is essential for electronics manufacturers to meet regulatory standards, protect human health and the environment, and maintain transparency in their supply chain. It also demonstrates a commitment to sustainability and responsible manufacturing practices in the electronics industry.
No SVHC - Radiation Hardening
Radiation hardening is the process of making electronic components and circuits resistant to damage or malfunction caused by high levels of ionizing radiation, especially for environments in outer space (especially beyond the low Earth orbit), around nuclear reactors and particle accelerators, or during nuclear accidents or nuclear warfare.
No - RoHS Status
RoHS means “Restriction of Certain Hazardous Substances” in the “Hazardous Substances Directive” in electrical and electronic equipment.
ROHS3 Compliant - Lead Free
Lead Free is a term used to describe electronic components that do not contain lead as part of their composition. Lead is a toxic material that can have harmful effects on human health and the environment, so the electronics industry has been moving towards lead-free components to reduce these risks. Lead-free components are typically made using alternative materials such as silver, copper, and tin. Manufacturers must comply with regulations such as the Restriction of Hazardous Substances (RoHS) directive to ensure that their products are lead-free and environmentally friendly.
Lead Free
Parts with Similar Specs
- ImagePart NumberManufacturerPackage / CaseNumber of PinsSupply VoltageOperating TemperatureRoHS StatusMounting TypeHTS CodeView Compare
![LIS3MDLTR]()
LIS3MDLTR
12-VFLGA
12
2.5 V
-40°C ~ 85°C (TA)
ROHS3 Compliant
Surface Mount
8542.39.00.01
![MMA7455LR1]()
14-TFLGA
-
2.8 V
-40°C ~ 85°C (TA)
ROHS3 Compliant
Surface Mount
8542.39.00.01
![MMA6361LT]()
14-TFLGA
-
-
-40°C ~ 85°C (TA)
ROHS3 Compliant
Surface Mount
8542.39.00.01
![MMA6331LR1]()
14-TFLGA
-
-
-40°C ~ 85°C (TA)
ROHS3 Compliant
Surface Mount
-


Datasheet PDF
- Datasheets :
 AT24C16C I²C-Compatible Serial EEPROM: Pinout, Equivalent and Datasheet
07 March 2022434
![PMDXB950UPE 20 V dual P-channel Trench MOSFET[FAQ]](https://res.utmel.com/Images/Article/340113cd-663b-4721-83d8-46968f2d84a6.png) PMDXB950UPE 20 V dual P-channel Trench MOSFET[FAQ]
PMDXB950UPE 20 V dual P-channel Trench MOSFET[FAQ]19 April 2022498
 CD4051BE: Featurs, Applications, and Datasheet
08 November 20232142
 LM358N Operational Amplifier: Pinout, Datasheet, and Schematic Diagram
02 July 202122408
![EV2400 Evaluation and Demonstration Boards USB 2.0[FAQ]: Datasheet, EV2300 VS EV2400, and Features](https://res.utmel.com/Images/Article/fef602f0-bea0-4737-8ace-f64c5e9484e5.jpg) EV2400 Evaluation and Demonstration Boards USB 2.0[FAQ]: Datasheet, EV2300 VS EV2400, and Features
EV2400 Evaluation and Demonstration Boards USB 2.0[FAQ]: Datasheet, EV2300 VS EV2400, and Features28 March 20226231
 Texas Instruments MSP430F2122TRTV: A Technical Overview
29 February 2024102
 CD4503 Tri-state Hex Buffer: CD4503 Datasheet PDF, Pinout, CD4503 vs. MC14503
18 January 20221983
 AO3400A 30V N-Channel MOSFET, 5.7A SOT23-3L and AO3400A Equivalents
24 February 20229518
 Microcontroller (MCU) Market Analysis
09 February 20225692
 2 Semiconductor Stocks to Buy Hand Over Fist in 2024 and 1 to Avoid Like the Plague
18 December 20233979
 Hydrogen Fuel Cell: Features, Working and Applications
21 June 20216190
 A Comprehensive Guide to FPGA Development Boards
11 September 202511807
 Network Interface Card: Types, Functions and Buying Guide
17 August 20219848
 Use the Renesas AE-CLOUD2 to Send GPS Data to the Google Cloud IoT
15 November 20191279
 Intel CEO Reiterates: 2024 Will Achieve Process Leadership
05 May 20221205
 An Overview of 12 Important CPU Specs
18 December 202112115
STMicroelectronics
In Stock: 5920
Minimum: 1 Multiples: 1
Qty
Unit Price
Ext Price
1
$6.105806
$6.11
10
$5.760195
$57.60
100
$5.434146
$543.41
500
$5.126553
$2,563.28
1000
$4.836370
$4,836.37
Not the price you want? Send RFQ Now and we'll contact you ASAP.
Inquire for More Quantity